How to Configure a Related Object Column in Salesforce Data Table?
Salesforce data tables organize records in a clear format, making it easy for users to view and manage data. Adding related object columns enhances data display and accessibility by consolidating information from related records into a single view, benefiting administrators.
For example, a table showing Opportunities can include related Account details, like Account Name or Industry, providing users with a complete picture without opening separate records.
Why Configure Related Object columns in data table Salesforce?
Adding related object columns to Salesforce data tables offers several benefits:
- Improved Data Visibility: By directly integrating information from related records into the data table, we can provide users with a comprehensive view that includes all essential information.
- Enhanced User Experience: Having all necessary data in one place allows users to find what they need more quickly, which boosts productivity and satisfaction.
- Customizable Data Display: We can select specific fields from related objects that best meet users’ needs, ensuring the data table aligns more closely with business objectives.
Steps to Configure a Related Object Column:
To display all related Contact records in a data table within Salesforce, start by creating a Salesforce screen flow, and then add it to the record detail page using the edit page option.
Create a Screen Flow:
Open Flow Builder and select the “Screen Flow” option to design interactive screens that present data and allow user input.
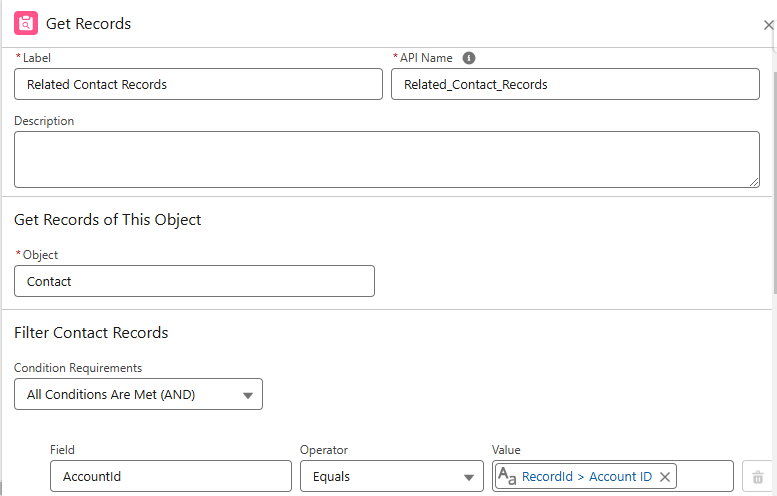
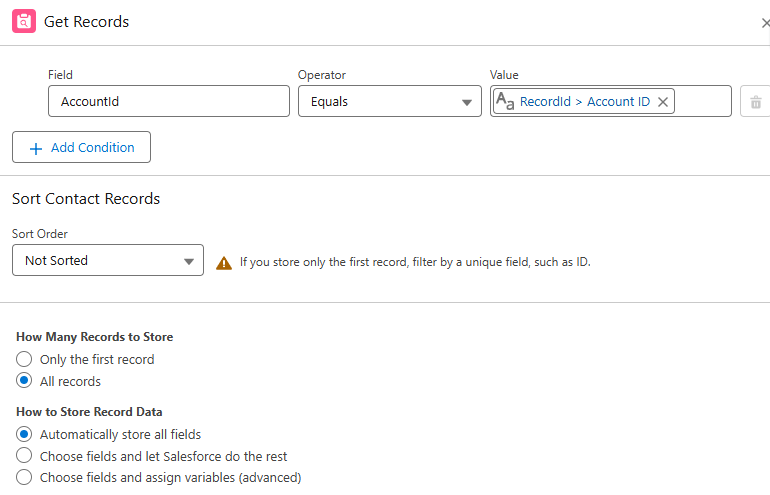
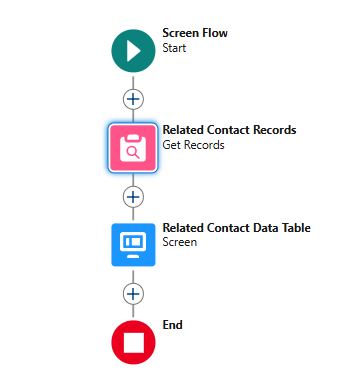
Retrieve Contact Records: In Flow Builder, use the “Get Records” element to pull related Contact records from the Contact object using the Account ID in Salesforce.
Configure the Screen Element:
After retrieving the Contact records, add a Screen element to display components like data tables.
For data table customization, start by placing the data Table component from the side panel on the Screen. Assign it an API Name, then, in the Data Source section, select the variable created in the Get Records element to retrieve the related contact records.
- Set minimum and maximum rows under Rows (leave blank for default).
- Under Columns, specify Salesforce table column configuration such as Contact Name, Phone, and Department.
Test the Data Table:
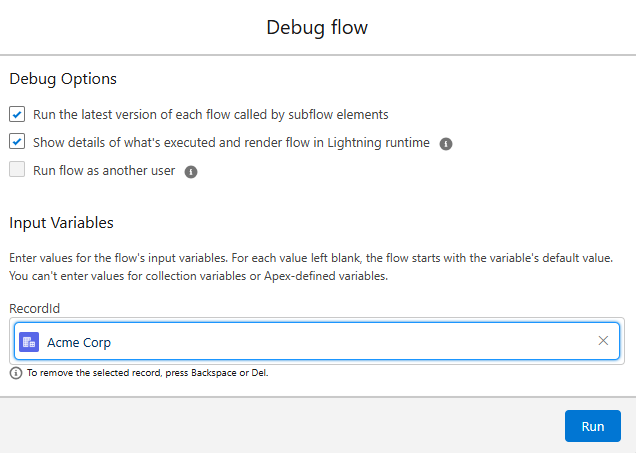
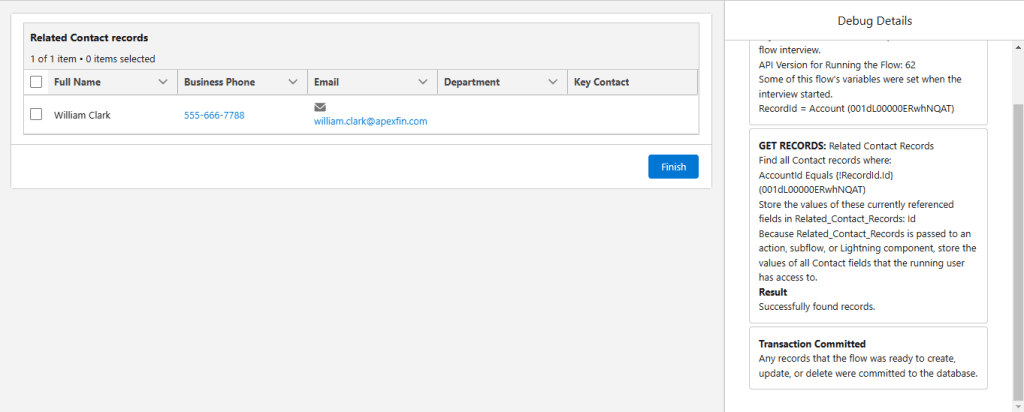
Finally, run the Debug tool to check if everything works as expected. Make sure the data table displays the Contact records correctly based on the selected Account, with display settings as configured.
To add a Flow to an Account Record Detail Page in Salesforce, follow these steps:
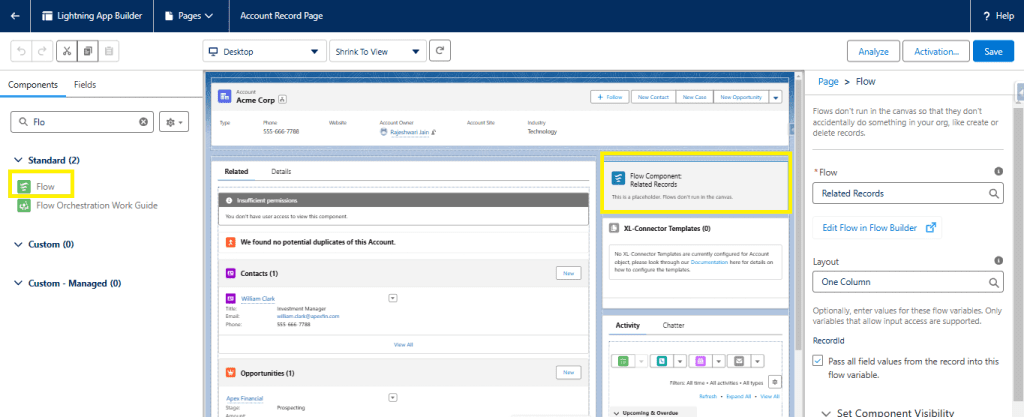
Open the Account Record: Navigate to any Account record and Select “Edit Page” from the gear icon in the top-right corner to access the Lightning App Builder.
Add the Flow Component: In the Lightning App Builder, from the side panel drag the “Flow” component and drop it onto the page layout. In the component settings, select the Flow you want to display.
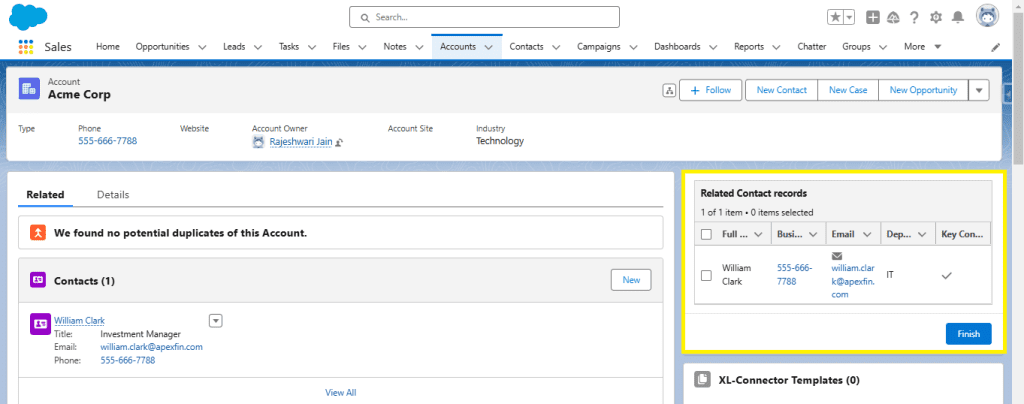
Save and Activate the Page: After saving your modifications, activate the page layout. Test the Account record page to ensure the Flow displays and functions as intended.
Conclusion:
Setting up related object columns in Salesforce makes it easy for users to manage related data without constantly switching between records. By customizing the columns to meet specific business needs, teams can focus on the most important data, making workflows quicker and more efficient.
For organizations looking to improve Salesforce data configuration, Xappex’s tool is a great option. It integrates with Salesforce, reduces repetitive tasks, and allows users to work directly in Excel or Google Sheets.
Start a 14-day free trial of XL-Connector and G-Connector and see an immediate boost in your data management!

Xappex CRM data management solutions

Looker Studio for Salesforce
Connect Salesforce reports and queries to your Google Data Studio dashboards.

Excel Merge
Calculate advanced Excel models. Generate Excel documents based on Salesforce data. All with a single click from a Salesforce record page.
