Is the CSV data export and import in Salesforce a best practice?
Salesforce is a powerful CRM platform for managing customer relationships and operations. Keeping data updated involves importing from external sources or exporting for analysis.
In this blog, we will use the Data Loader for imports and exports using Contacts. Plus, we’ll explore Xappex tools, a user-friendly alternative with advantages over the Data Loader.
How to Import Data into Salesforce from a CSV File?
The Salesforce Data Loader is a client application for bulk importing and exporting data in Salesforce. It allows for efficient record insertion, updating, deletion, and export.
It can import data from CSV files or database connections and export Salesforce data to CSV files for tasks like reporting or data backups.
Here’s a basic overview of importing data using the Salesforce Data Loader:
• Prepare your CSV file: Make sure your data is correctly formatted, with each column representing a Salesforce field and each row representing a record. Ensure the data in your CSV file is clean and formatted correctly.
• Configure Data Loader: Download and install the Data Loader, log in using your Salesforce credentials, and select the ‘Insert’ operation to import new records.
• Map CSV fields to Salesforce objects: Match the corresponding fields in your CSV file to the appropriate Salesforce object fields. Verify the mappings and start the import process.
How to prepare a CSV for import into Salesforce?
To ensure a smooth Salesforce import, meticulously prepare and organize your data. This proactive approach can help avoid potential roadblocks and ensure a seamless transition.
Cleanse and Refine Your Data:
- Be consistent with naming conventions and eliminate irrelevant information.
- Double-check for accuracy and update outdated data.
- Remove duplicates to avoid redundant data in Salesforce.
Modify your Salesforce Configuration (if required):
- If your import file has values that are not in your Salesforce picklists, add them first. Create custom fields for unique data. Temporarily deactivate workflow rules that hinder the import process and reactivate them after importing.
Map Your Data Fields:
When importing data, carefully map the fields in your import file to the corresponding Salesforce fields to ensure accurate data import.
Save as CSV:
Save your cleaned, configured, and mapped data in CSV format for compatibility with the Salesforce import process.
By following these steps, you will be well on your way to a smooth and successful Salesforce import, enabling you to utilize your data within your CRM system effectively.
How do we import Contacts into Salesforce from CSV?
Before diving into the import process, ensure your CSV file is formatted to integrate with Salesforce seamlessly. Here’s a quick checklist:
- Clear and Consistent Column Headers: Use descriptive column headers that match the corresponding Salesforce contact fields exactly.
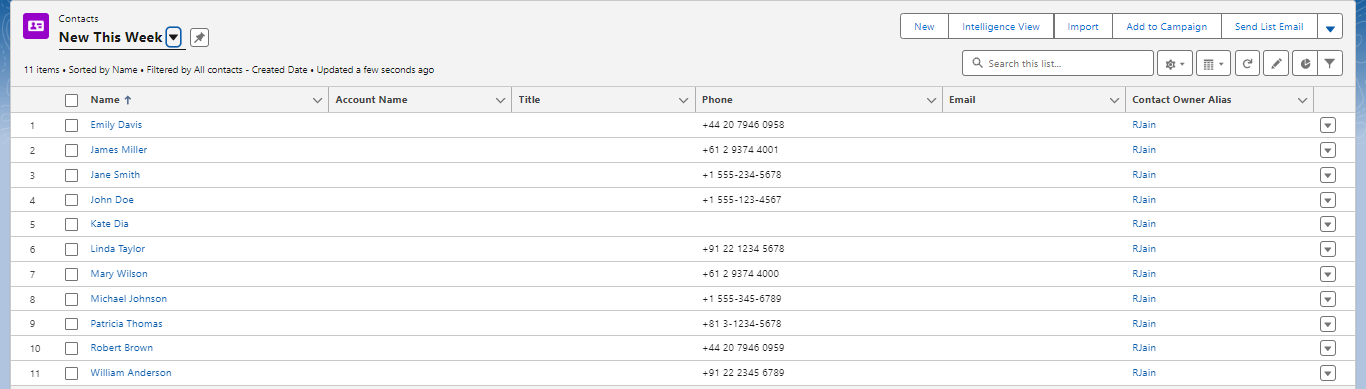
- Mandatory Fields: Include the required fields of your Salesforce organization to create new contacts. Typically, “LastName” is a mandatory field, but verifying the complete list within your specific Salesforce settings is best.

Download and install the Salesforce Data Loader. Open the application and enter your Salesforce login credentials.
Upload CSV to Salesforce:
In Data Loader, choose “Insert” for new contacts.

Please ensure that you select “Contact” as the import object and then browse to select your CSV file.
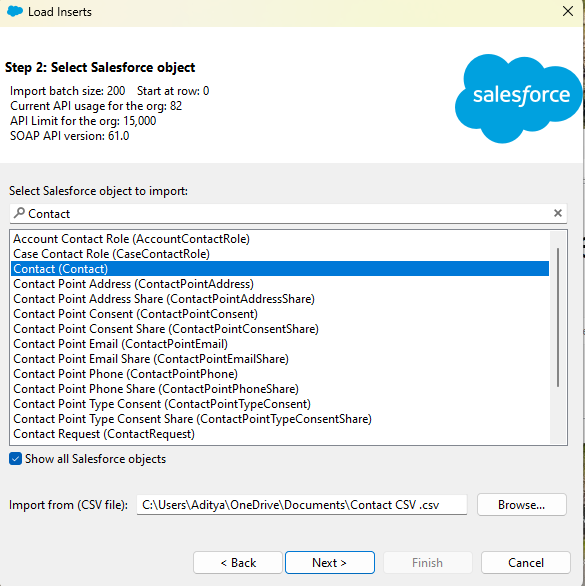
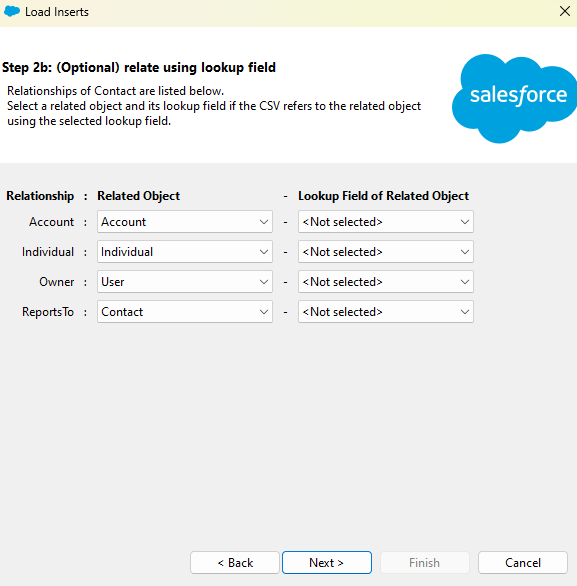
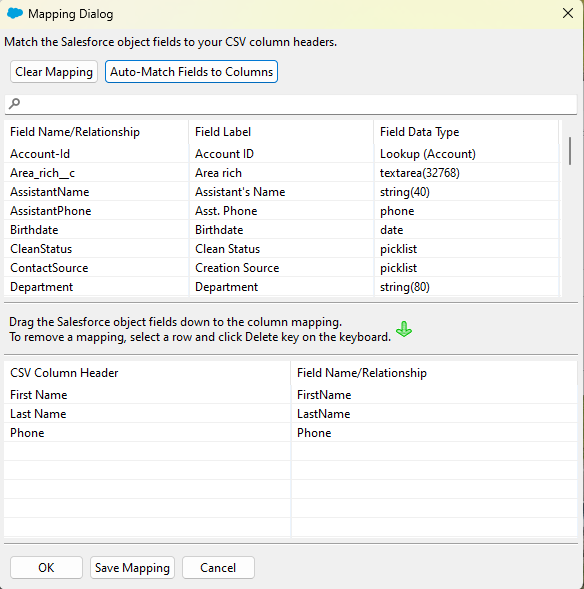
Review and adjust field mappings (column headers to Salesforce fields). Do not map the lookup fields for now.
Data Loader will attempt to map fields automatically, but you should verify and adjust the mappings as necessary.
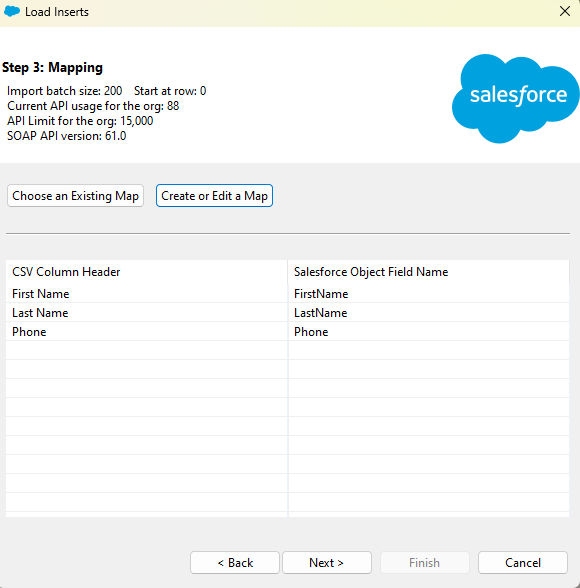
Set locations for success/error logs.
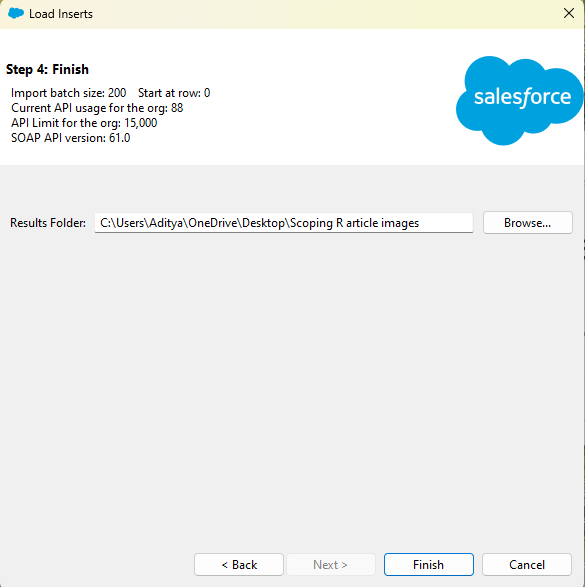
Click “Finish” to import.

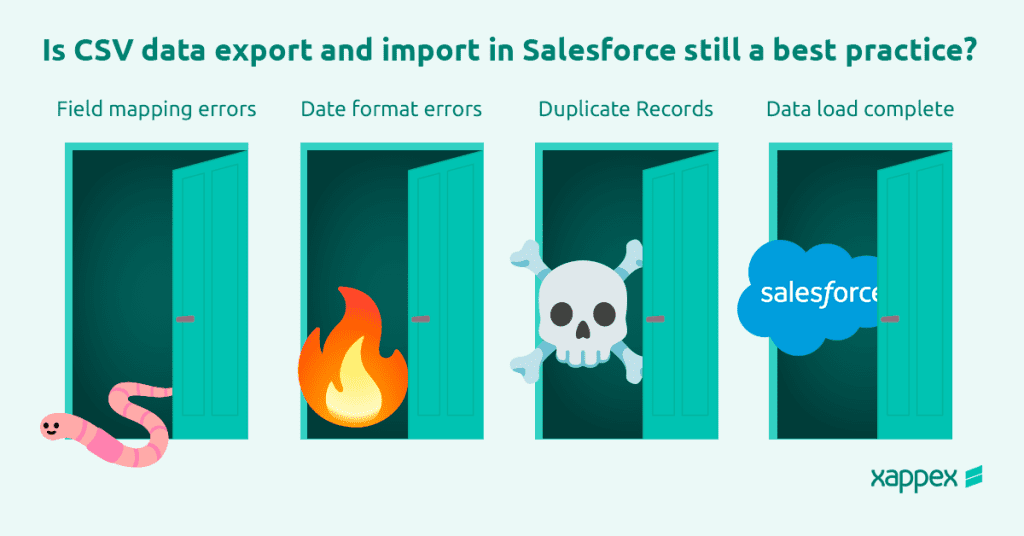
Several challenges can occur during the import process using a Data loader:
- Field mapping errors: If you map fields incorrectly, data may be in the wrong places. Always verify your mappings before initiating the import.
- Data Formatting Errors: Dates, phone numbers, and other details in your CSV must be formatted consistently (e.g., all dates in YYYY-MM-DD format). Inconsistent formatting can cause import failures.
- Duplicate Records: If your CSV contains duplicate entries (like the same email address for two contacts), Salesforce may reject them depending on your duplicate rules.
- Validation Rule: Salesforce might have specific rules your data needs to follow (e.g., email addresses must be unique). If your data doesn’t comply with these rules, the import will fail for those particular entries.
- Permission Problems: Ensure you have the necessary permissions to import data into Salesforce. If you don’t have the proper permissions, the import process won’t be able to proceed.
Also read: Best Salesforce Data Loader Tools: Pros, Cons & Features
The Xappex alternative to importing files to Salesforce:
XL-Connector 365 enables easy data insertion into Salesforce from Excel. Follow these steps for a smooth process:
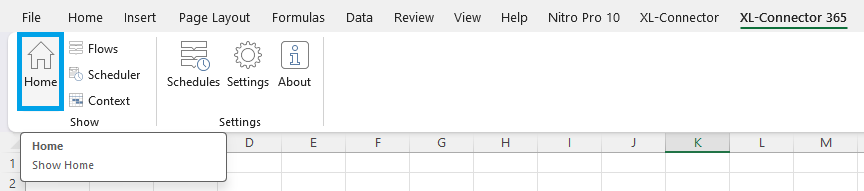
Launch the XL-Connector 365 add-in in Excel and log in to Salesforce using your credentials.
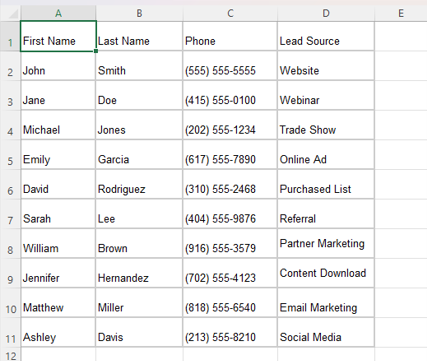
Prepare Your Data: Organize the data you wish to insert into Salesforce in Excel. Ensure your columns correspond to Salesforce fields.
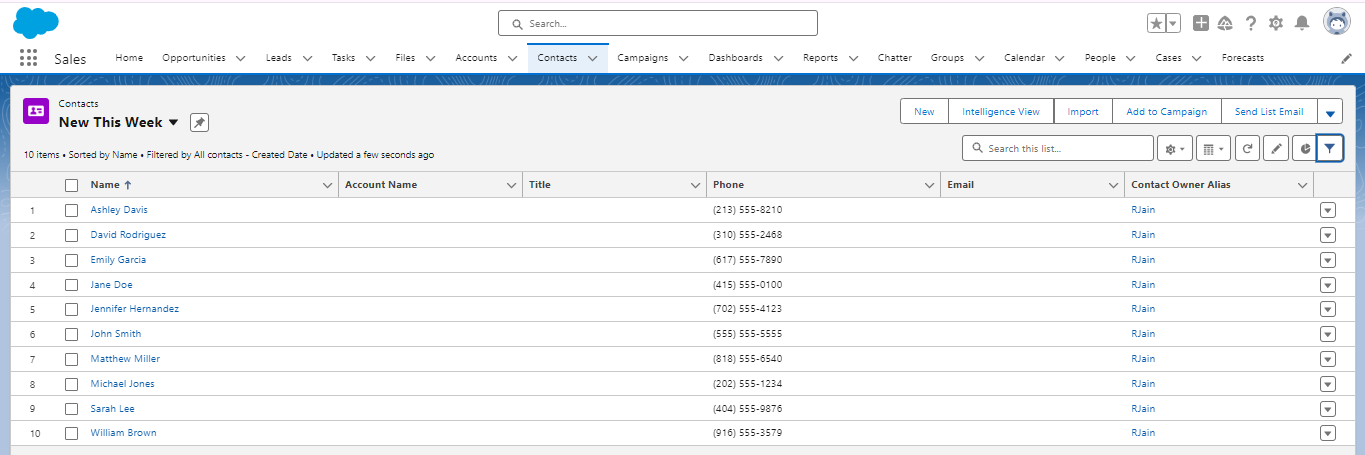
To initiate Data Import, click the “Insert” button in the XL-Connector 365 ribbon and select the Salesforce object where you want to insert the data (e.g., Contacts).
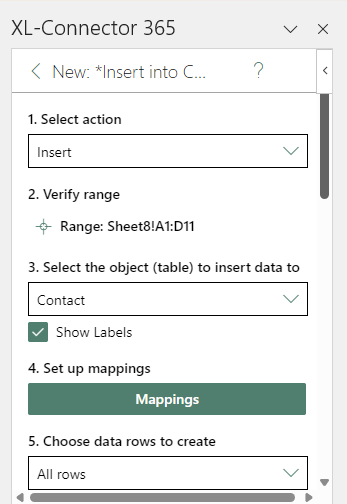
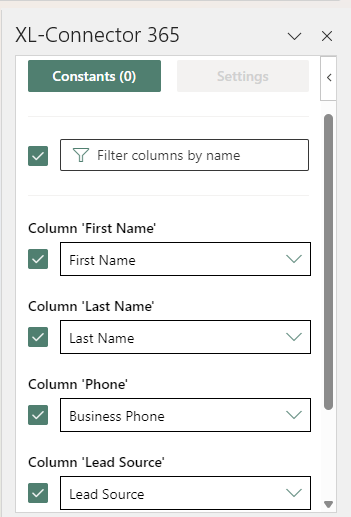
Map the Excel columns to the corresponding Salesforce fields. XL-Connector 365 provides a user-friendly interface to ensure accurate field mapping.
From Options, we can customize the batch size, load empty values, or run synchronously, based on your requirements.
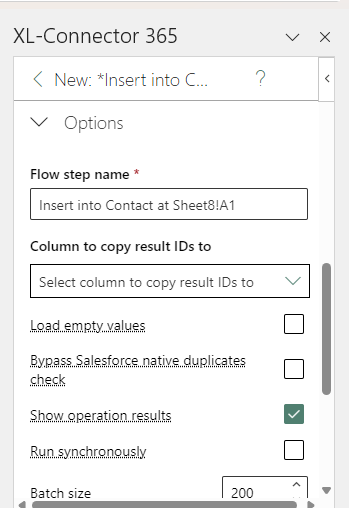
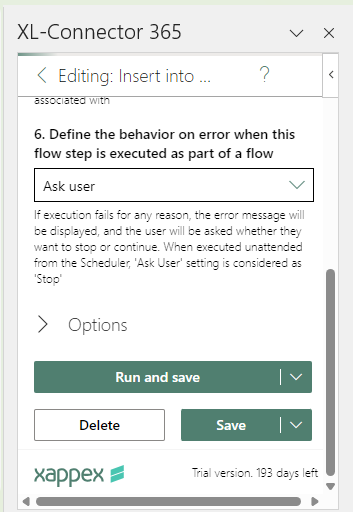
Click the “Run and Save” button to insert data to your Salesforce Org.
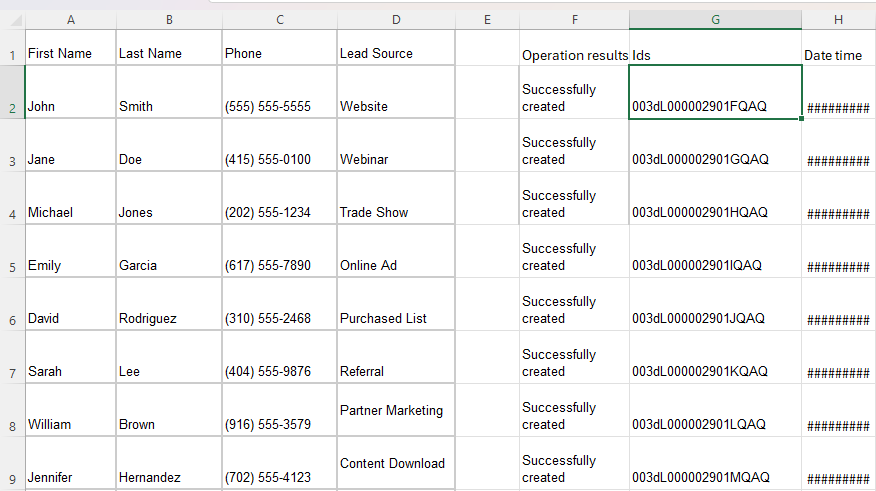
XL-Connector 365 provides a report of successful and failed inserts along with the record IDs.
How to export data from Salesforce to CSV?
Exporting data from Salesforce to a CSV file is important for businesses that need to analyze and use their Salesforce data in other applications. By following a few simple steps, users can easily extract the data they need, making it accessible for sharing and further analysis.
To Know more, please refer: Export Data from Salesforce
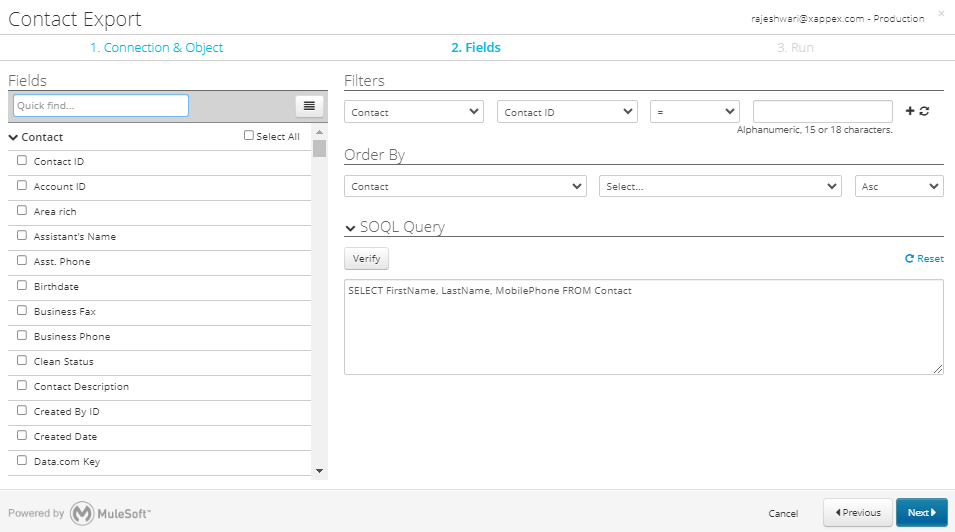
Example: How to export contacts from Salesforce to CSV?
Ready to get your Salesforce contacts into a CSV file? Follow these steps using DataLoader.io:
- Sign In: Open DataLoader.io and enter your Salesforce login credentials to establish a connection.
- Create a New Export Task: Click the “New Task” button and choose “Export” to initiate a new export job.

- From the available objects, select “Contact” to specify the object from which you want to export.
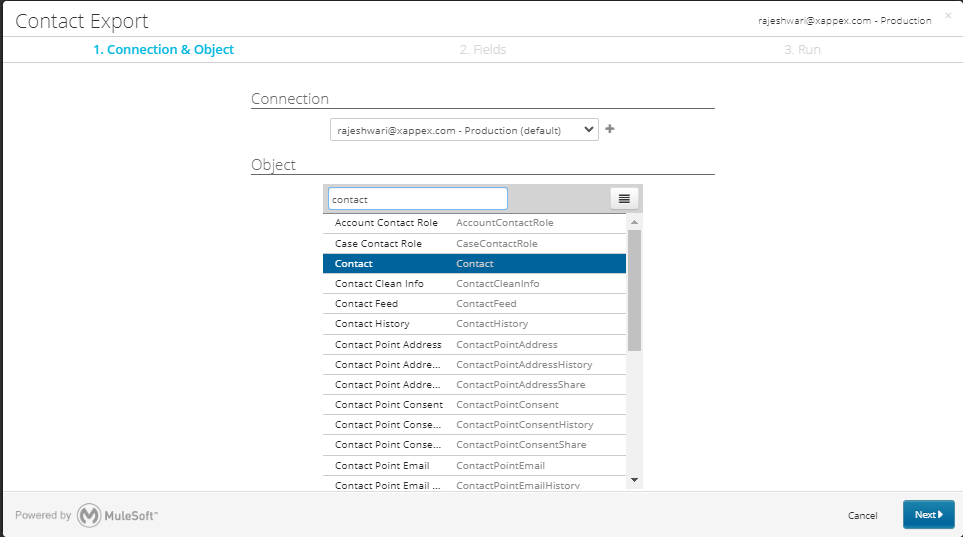
- Choose the Contact Fields: To choose the contact details you need, click “Select Fields” and pick options like First Name, Last Name, Email, and Phone Number. If you’re looking for specific contacts, you can use the “Filter” section.
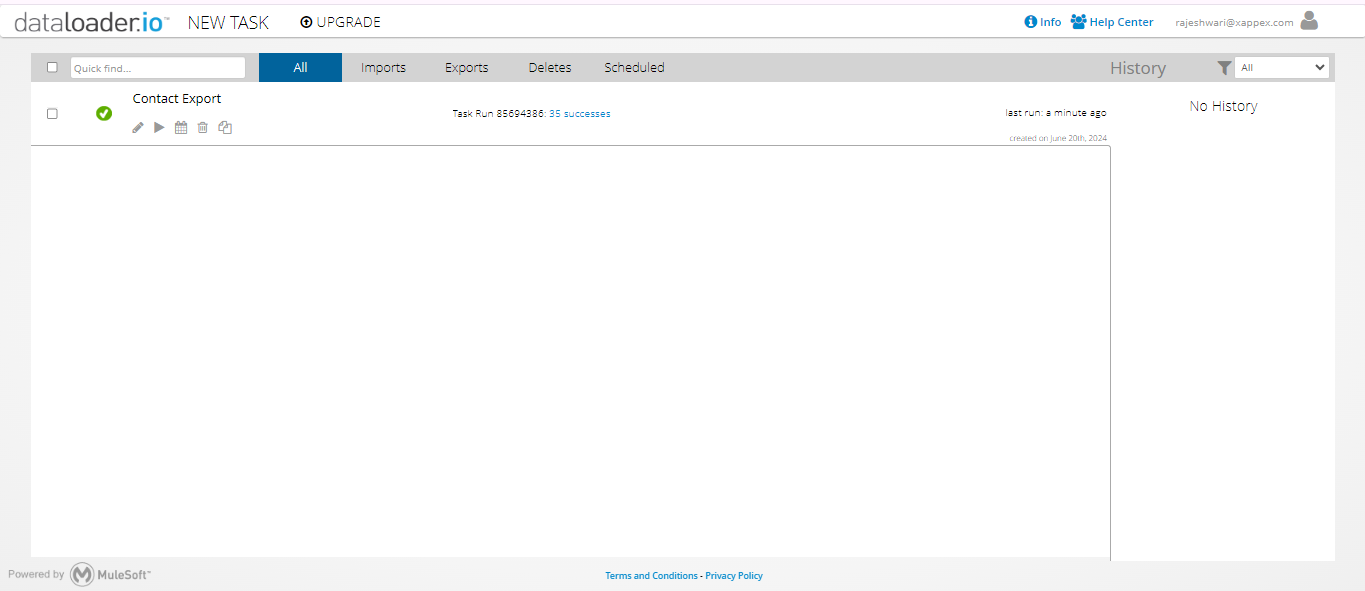
- Start the Export: Click “Save & Run” to begin the export process immediately. Alternatively, you can schedule the export for a later time if needed.

- Download Your CSV: DataLoader.io will provide a download link for your CSV file once the export is finished.
While the export process is straightforward, a couple of roadblocks can arise:
Permission Issues: Users must have the correct permissions to export data. If you encounter permission errors, contact your Salesforce administrator to ensure you have the necessary access.
Export Limitations: Salesforce limits the number of records that can be exported at one time. Be aware of these limits and plan your export accordingly, potentially dividing it into smaller batches if needed.
Scheduled Exports: When scheduling an export, it’s crucial to ensure the timing does not conflict with other system activities that could impact performance or data availability.
The Xappex alternative of CSV for Salesforce data exports?
XL-Connector makes it simple to bring your Salesforce data directly into Excel spreadsheets.
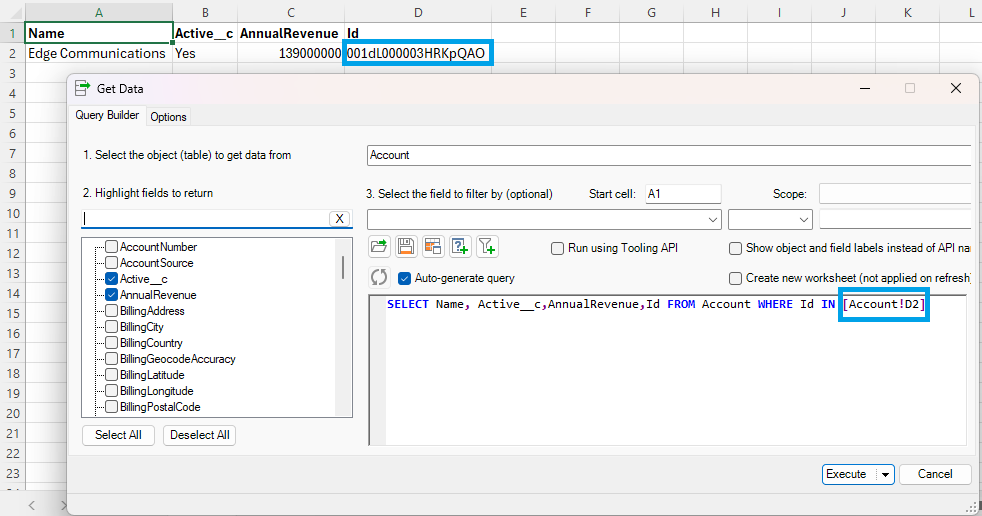
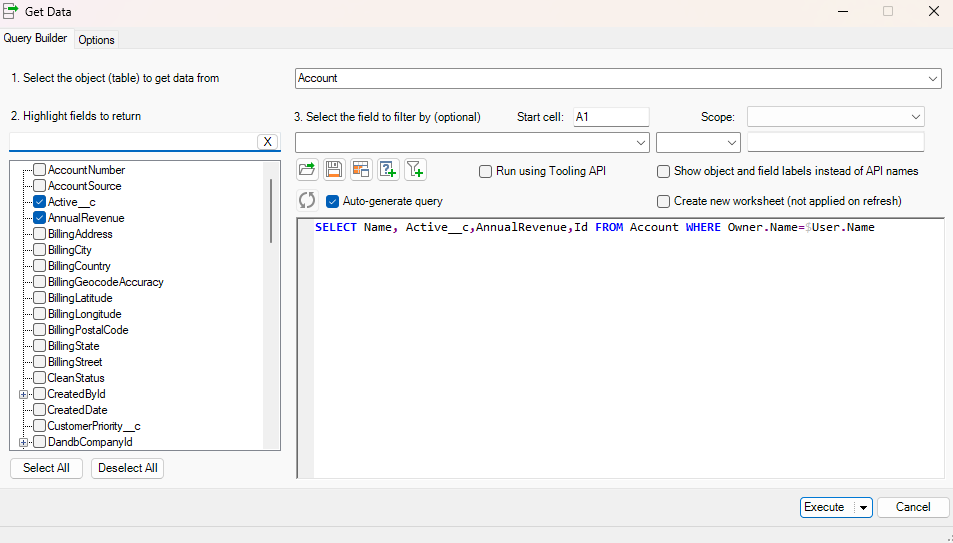
Using SOQL:
XL-Connector offers two data import methods: pre-written SOQL queries or a user-friendly query builder tool. This caters to both experienced coders and those new to the SOQL language.

Features for Smoother Imports:
- Grab Values from Spreadsheet: Prevent typos and save time by incorporating values directly from your spreadsheet into your query. XL-Connector handles the formatting and integration seamlessly.
- Auto-generate query: Automatically updates the query when you change the builder controls. Uncheck this if you prefer to enter the query manually and use the ‘Refresh query’ button as needed.
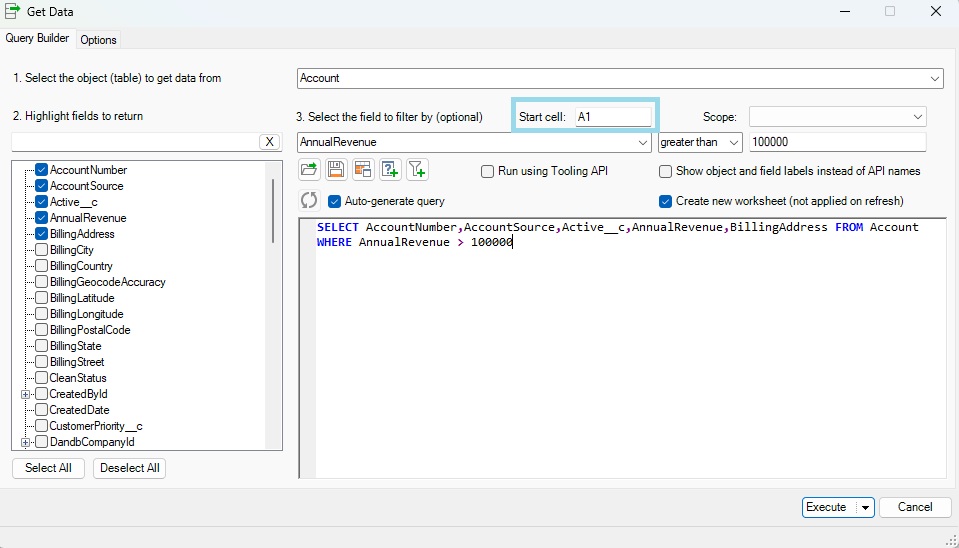
- Positioning Data: Import your data exactly where you want it within your Excel spreadsheet by selecting the start cell.
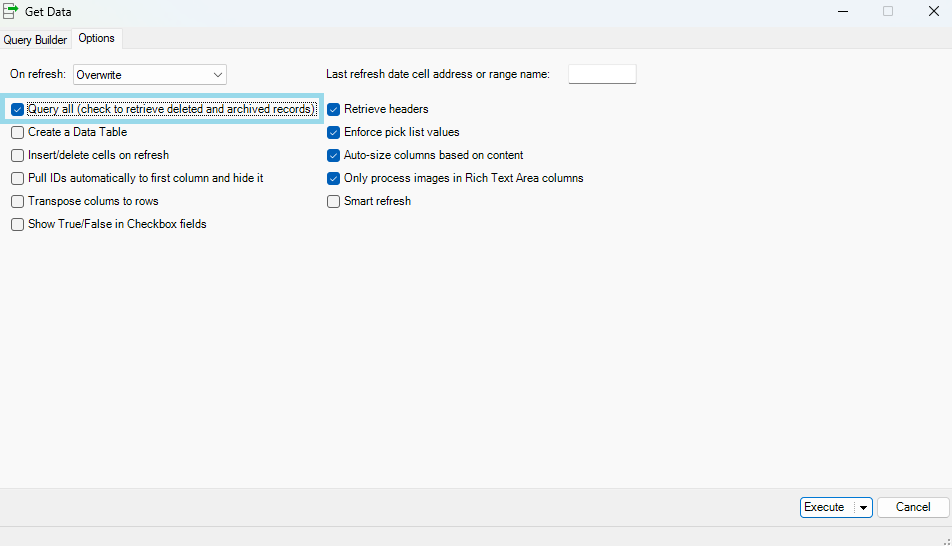
- Query all: Retrieve all records including deleted and archived ones.
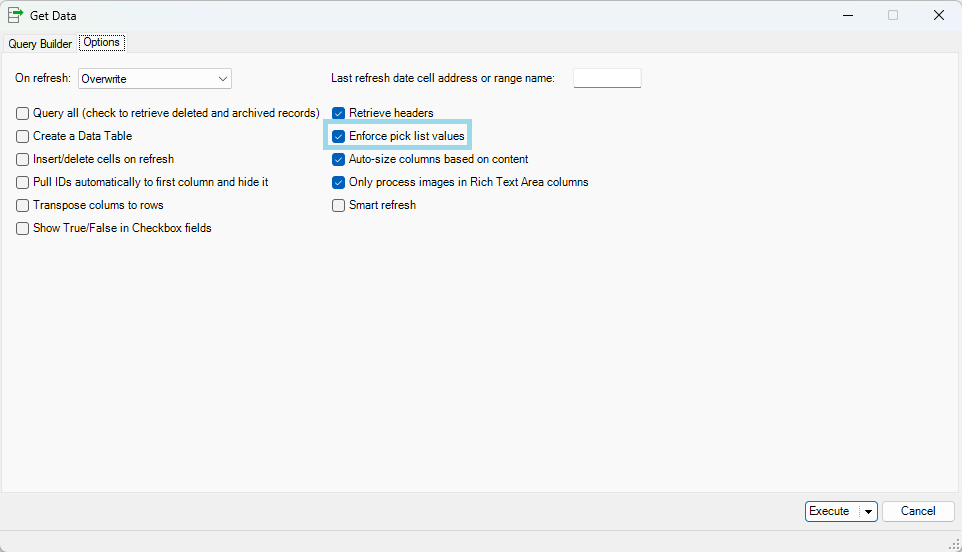
- Enforcing Picklist Values: Maintain data consistency by creating drop-down menus in Excel for picklist fields. This ensures users select valid options.
- Dynamic SOQL: XL-Connector supports dynamic elements within your SOQL queries. You can include information about the currently logged-in user or specific cell values from your spreadsheet.
With XL-Connector, Salesforce data can be easily imported into Excel for streamlined analysis and reporting.
Using Reports:
XL-Connector allows you to select and import your chosen report data directly into your Excel sheet with just a few clicks.

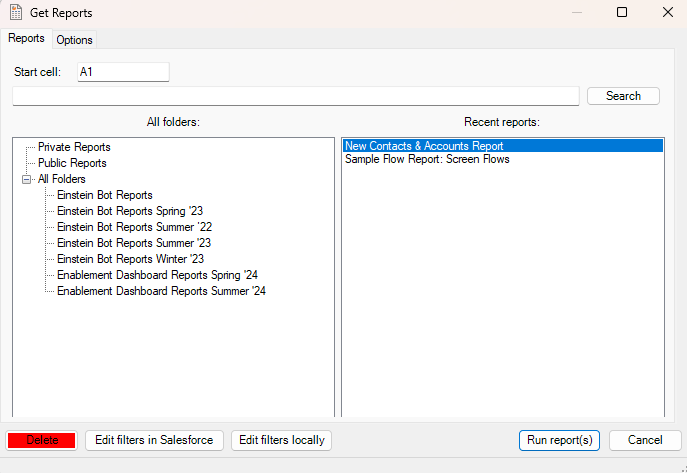
Data Filtering Options
You can filter the data in two ways:
- Filter in Excel: Apply filters directly in your Excel sheet to view only the necessary information.
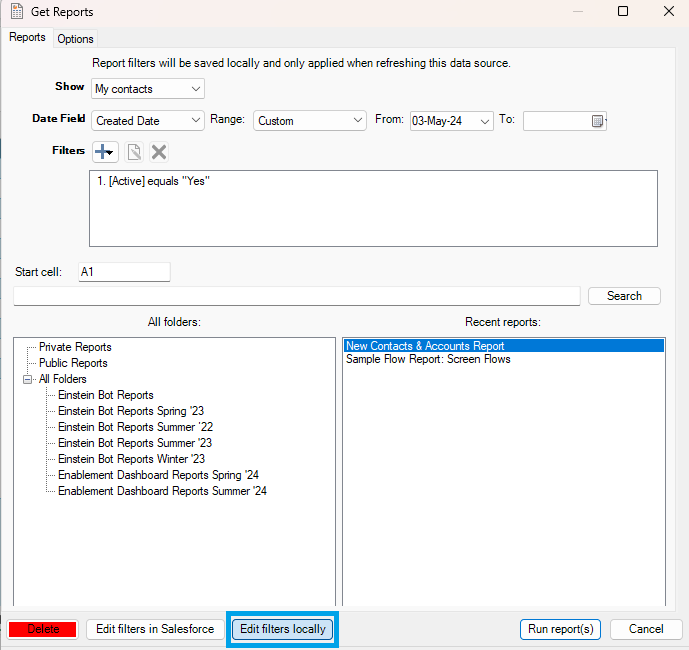
- Filter in Salesforce: Set filters in Salesforce before importing so that you only retrieve the data you’re interested in.
These features make managing and analyzing your Salesforce data in Excel both quick and efficient.
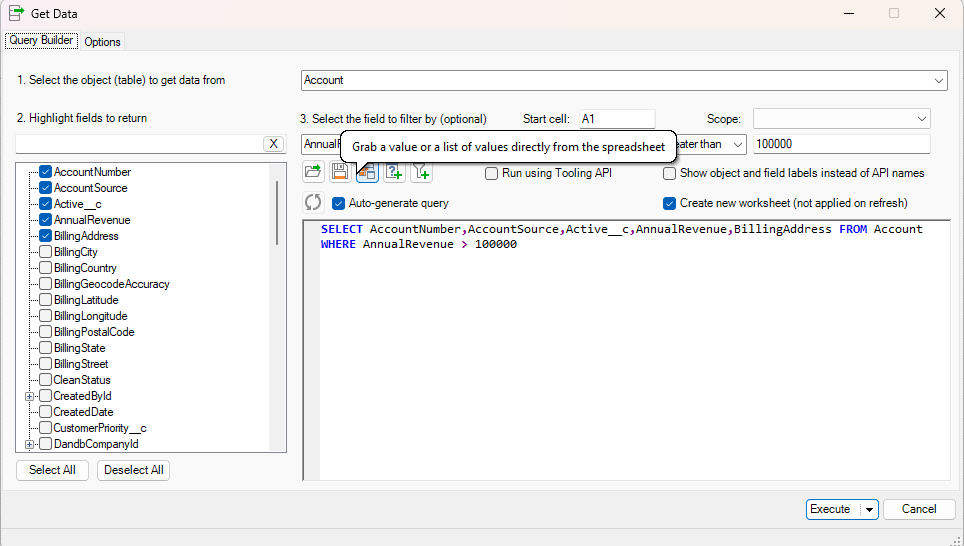
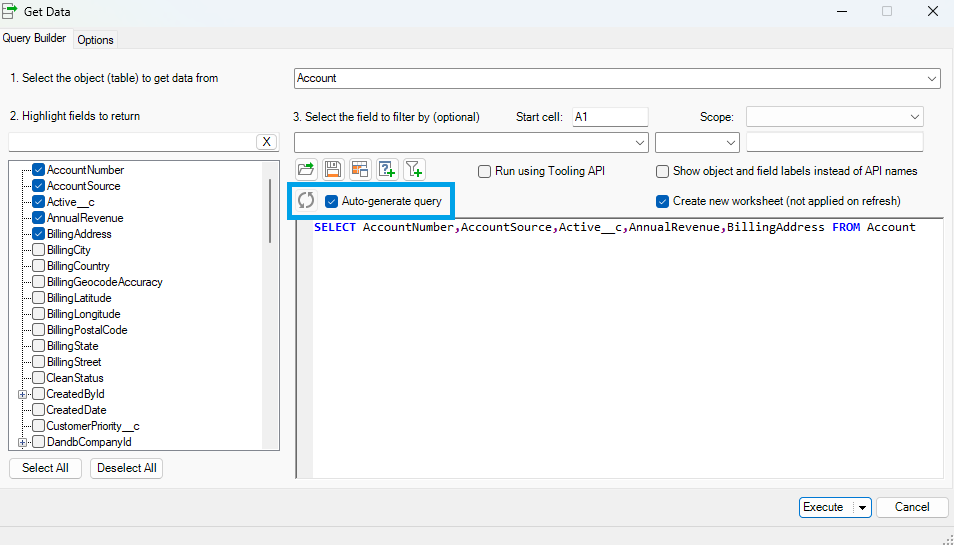
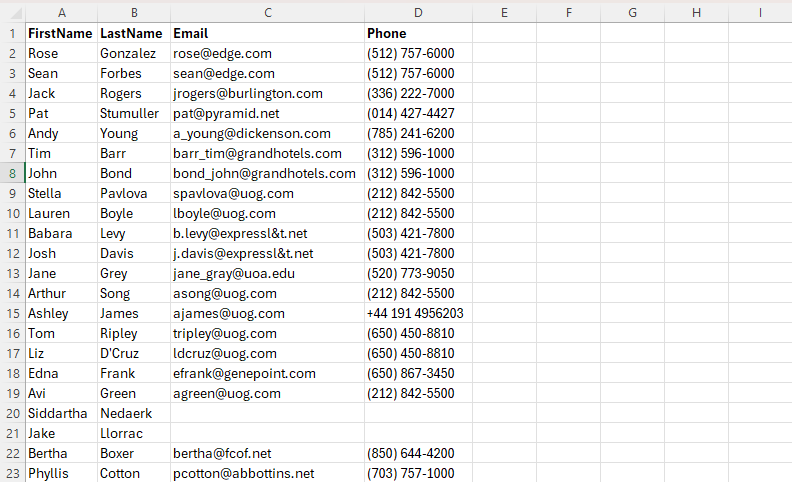
Example: Lets export Contacts from Salesforce to Excel using XL- Connector.
Ensure the XL-Connector is installed and configured in your Excel.
Click the “Get Data” button within the XL-Connector ribbon.
You can select the contact fields to export (e.g. First Name, Last Name, Email, phone) and apply scope as mine.
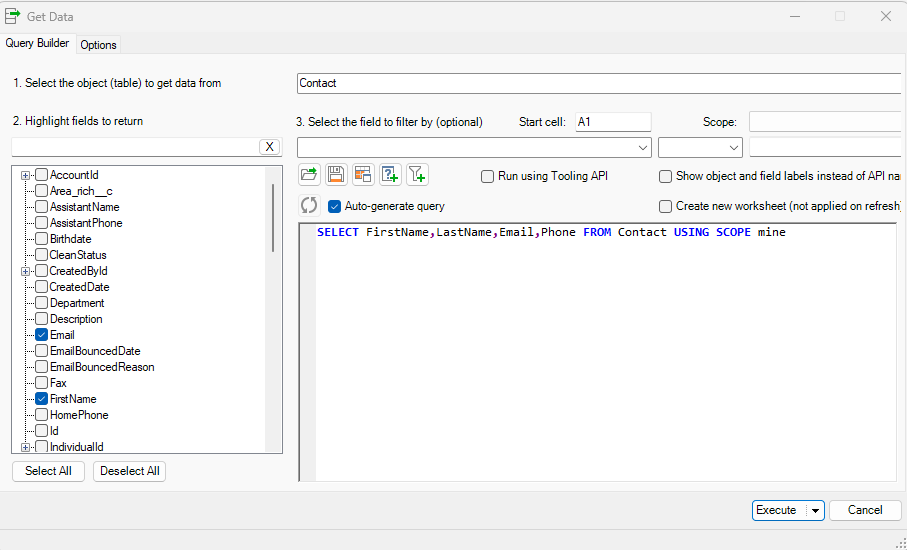
Click the “Execute” button. This initiates the export process, and your chosen Contact data will populate the designated location within your connected Excel spreadsheet.
The Advantages of using Xappex for data imports and exports:
No Manual Labor: Xappex automates the data import and export process. This means you don’t have to do it by hand, saving time and reducing the chance of mistakes.
Automation: The platform allows you to schedule data transfers automatically. You don’t need to monitor the process constantly, ensuring data transfers happen on time and consistently.
Convert IDs: If you are importing data from an external source that uses the old 15-digit ID format and need to match it with Salesforce records with an 18-digit ID, the “Convert Ids” function can help.
No Need to Provide ID: Xappex can match Salesforce relationship fields to records without needing you to provide IDs. This simplifies the process of mapping data fields and integrating them correctly.
To know more, please refer: https://www.xappex.com/blog/match-salesforce-relationship-fields-to-records-with-no-id/
Direct Spreadsheet Integration: With Xappex, you can work directly in a spreadsheet without using CSV files. This makes the process quicker and more intuitive, especially for those familiar with spreadsheets.
No Need for Apex Knowledge: Xappex doesn’t require knowledge of programming or Apex code, making it accessible to everyone, even those without technical skills.
Error Validation and Identification: The platform can detect and point out errors during data imports and exports. This helps you quickly fix any issues, ensuring your data is accurate and reliable.
In summary, Xappex tools simplify importing and exporting data in Salesforce. They save time, reduce errors, and don’t require any programming knowledge, making them valuable tools for managing Salesforce data effectively.
Conclusion:
Managing data imports and exports in Salesforce is crucial for maintaining accurate records. The Data Loader can be time-consuming and requires technical knowledge. On the other hand, Xappex offers a user-friendly interface, automates tasks, and integrates seamlessly with spreadsheets. This makes it a valuable tool for handling data imports and exports.
Start a 14-day free trial of XL-Connector , XL-Connector 365 and see an immediate boost in your data management!

Xappex CRM data management solutions

G-Connector for Salesforce
Connect your Salesforce data to Google Sheets in a two-way sync.

XL-Connector for Salesforce
Connect and export your Salesforce data to Excel.

Looker Studio for Salesforce
Connect Salesforce reports and queries to your Google Data Studio dashboards.

Excel Merge
Calculate advanced Excel models. Generate Excel documents based on Salesforce data. All with a single click from a Salesforce record page.

XL-Connector 365
Connect and sync Microsoft Excel on all platforms with Salesforce.