How to set up and automate Salesforce Record alerts?
Tracking your data and record changes is crucial for making quick, informed decisions. It’s essential to monitor data and keep everyone updated after changes. However, setting up and maintaining Salesforce’s native tools can be difficult.
This article will explain the importance of Salesforce record alerts, their limitations, and the best automation tools to keep your team informed. We will also introduce G-Connector, an app that makes this process easier and improves communication with people outside your organization.
What are Salesforce Record Alerts?
Salesforce record alerts are automated notifications that inform you about specific actions within the Salesforce platform. For example, you can set up alerts to notify you when a new record is created, or an existing one is updated. These alerts help teams stay on top of changes and promptly address important information, facilitating swift and efficient responses.
Why do you need to set up Record Alerts?
Setting up record alerts in Salesforce ensures users never miss critical updates and can act promptly. Here are some key reasons why Salesforce users need to set up record alerts:
- Get Notified Instantly: Receive immediate alerts for significant changes or required actions, allowing faster responses.
- Improve Efficiency: Automating alerts reduces manual tracking and follow-ups, freeing time for strategic tasks.
- Enhanced Collaboration: Keep team members informed about changes in real-time, promoting better coordination and teamwork.
- Customer Satisfaction: Stay on top of customer interactions and needs, leading to a more proactive and responsive service.
- Ensure Data Accuracy: All team members can access the latest updates, minimizing errors and inconsistencies.
How do Record Alerts look in Salesforce?
In Salesforce, record alerts are notifications triggered by specific events or changes in data. These alerts can notify users, send emails, or even update records. Let’s create an email alert for the Opportunity object using Salesforce Flows.
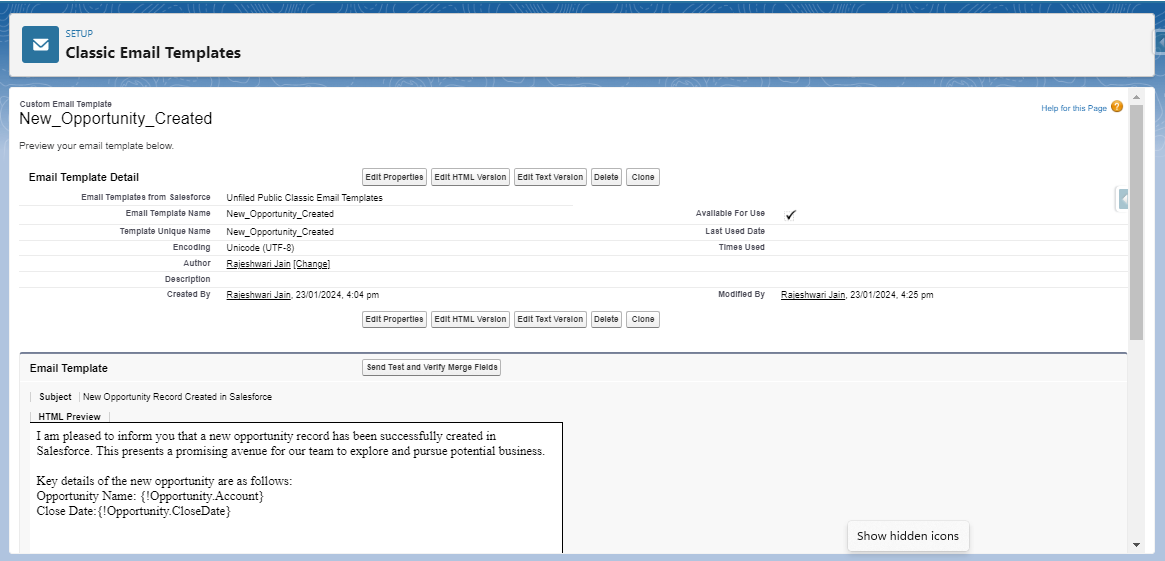
- Create an Email Template: Go to Setup (gear icon) and search “Email Templates.”
Choose your template type (Text or HTML) and fill in the details you want recipients to see (Opportunity name, amount, etc.). Save the template for later.
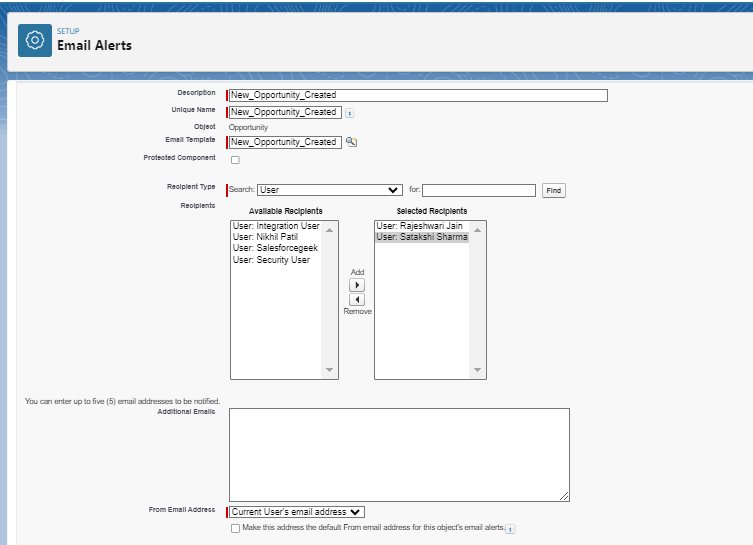
- Create Email alert for Opportunity: In Setup, find “Email Alerts.” Click “New Email Alert” and give it a clear name (e.g., “New Opportunity”). Select “Opportunity” as the trigger object. Choose the template created in step 1 and enter the recipients’ email addresses (Sales Manager, team members, etc.).
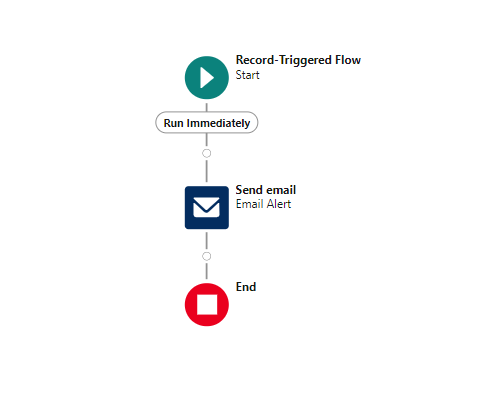
- Create a new flow: Go to Setup and select “Flows.” Create a new Record-Triggered Flow for the Opportunity object. Set the trigger to “A record is created.” Add an action to send the email alert. Save and activate the flow.
To Know more, please refer: Email Alert Actions
Limitations of Native Salesforce Tools:
- Tricky Setup: While Salesforce offers tools like Flow Builder to automate tasks, these tools can be confusing, especially for people unfamiliar with technical stuff.
- Hard to Maintain: As your company grows, keeping track of all the automation rules you’ve set up and making any needed changes can become challenging. It can take up a lot of time and resources.
- Basic Formatting: The alerts you create directly in Salesforce offer few choices for how they look or are delivered.
As we conclude configuring and customizing Salesforce email alerts, imagine enhancing this further by integrating these notifications with other platforms in your workflow.
G-Connector by Xappex can make this happen.
G-Connector – Your Ultimate App for Notifications in Salesforce
The G-Connector app simplifies setting up notification for Salesforce, by providing a powerful set of tools that help Salesforce users to streamline their data management directly from Google Sheets.
This integration allows for better task organization, with alerts sent directly to team members, ensuring everyone stays informed and aligned, even those with no access to your Salesforce org.
Key Features:
One of G-Connector’s standout features is its ability to send alerts or notifications when certain conditions are met for a cell or range of cells within a Google Sheet.
Setting Up Conditional Alerts
G-Connector allows users to configure alerts based on specific criteria. For example, you can set an alert to notify you if a cell’s value exceeds a particular threshold or if specific text appears in a range of cells.
This flexibility allows you to monitor various data points tailored to your needs. You can customize these alerts to focus on the most relevant data, ensuring you receive notifications only when the predefined conditions are met.
Periodic Condition Checks
These alerts can be set to check the conditions periodically. This means that the system will evaluate the criteria at regular intervals and send notifications accordingly. This automated monitoring ensures you stay updated on critical data changes without constant manual oversight.
Flexible Notification Channels
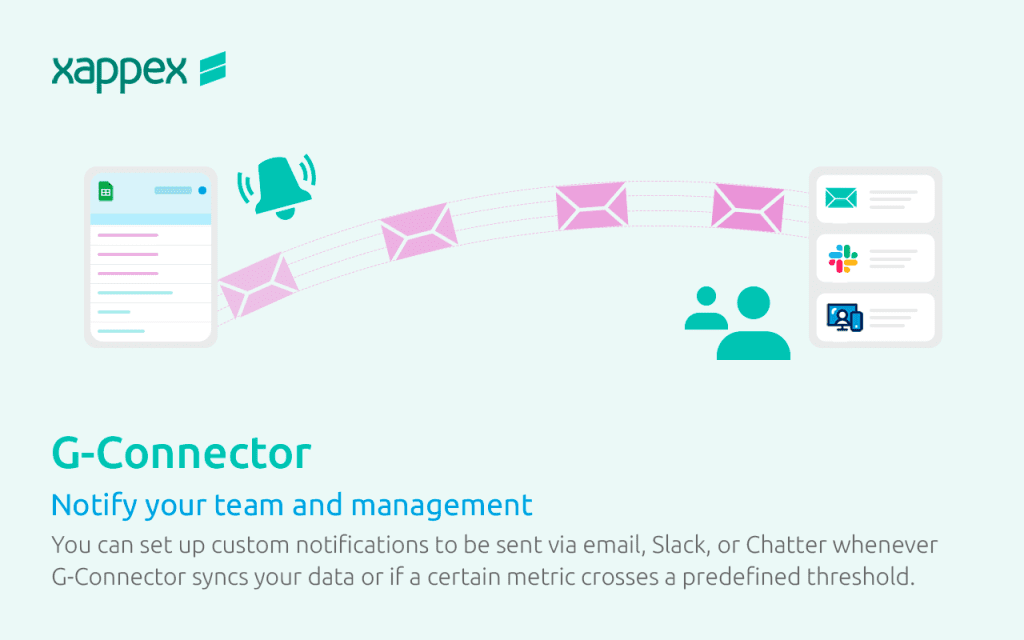
G-Connector allows you to send alerts through various channels, including email, Slack, and chatter.
This ensures team members receive timely and convenient notifications, regardless of their platform. G-Connector caters to your team’s diverse communication preferences with multiple notification options.
How do we send Notifications using G-Connector?
First, install G-Connector and log in to your Salesforce Org.
Step 1: Import Your Records using G-Connector
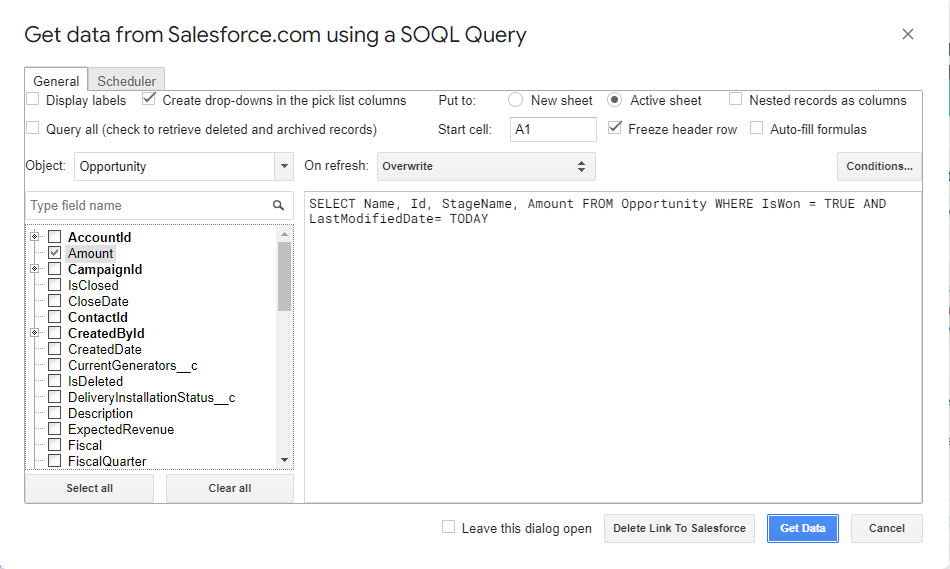
Ensure you installed the G-Connector add-on and log in to your Salesforce account. Then, choose the Salesforce objects and fields you want to import using SOQL or Reports.
Step 2: Automate your data operations.
With G-Connector, you can automate Salesforce data operations in a Google Sheet and schedule them for offline refreshes at your desired interval. It simplifies data sharing via Google Drive. Recipients of the shared spreadsheet do not need G-Connector access to view the data.
With options ranging from hourly to weekly updates, you can ensure your data stays current – all without manual intervention.
Launch G-Connector from the Google Sheets add-on menu.
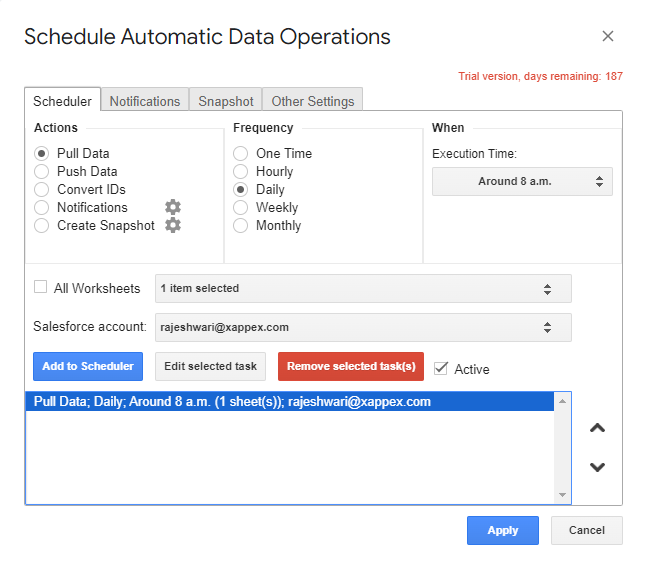
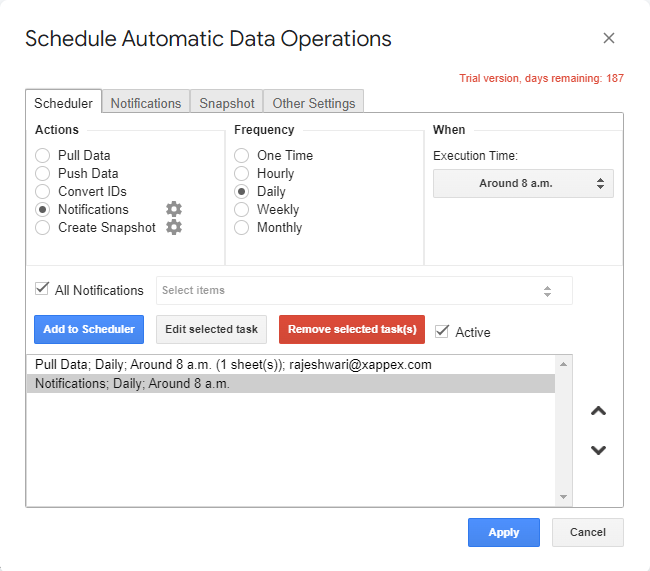
Navigate to “Schedule Automatic Data Operations” or access it from the Automation section in G-Connector’s side panel. In the dialog box, select the frequency of data operations – one-time, hourly, daily, or weekly.
Step 3: Automate notifications sent to team members and management
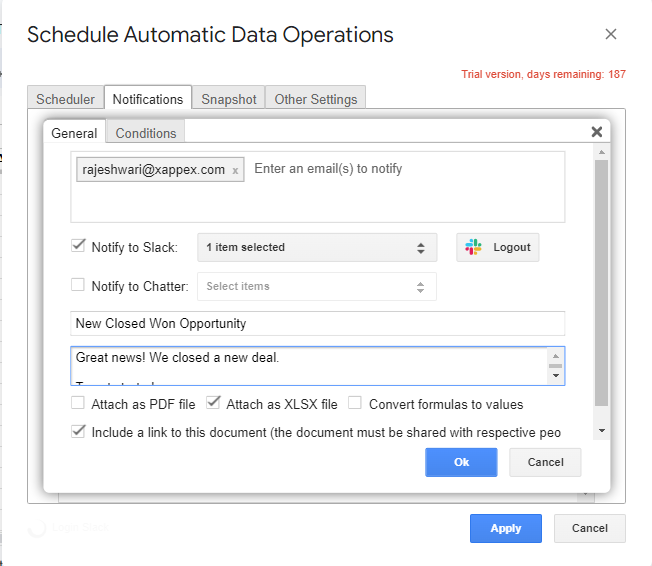
In the “Schedule Automatic Data Operations” dialog, navigate to the “Notifications” tab and press the “Add” button to set up a new notification. Choose the channels for sending alerts, such as email, Slack, or Chatter, and designate the recipients.
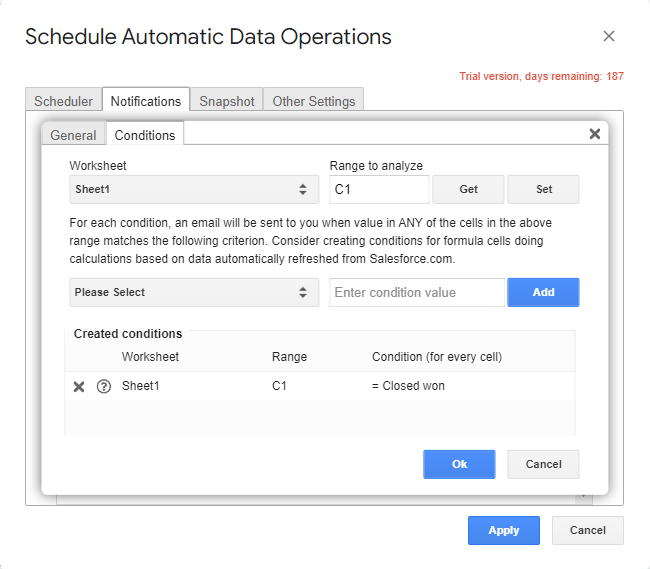
Additionally, you can set specific conditions for each notification. To configure these, go to the “Conditions” tab.
To initiate automated notifications, navigate to the Scheduler tab and add a “Notifications” action to the action list. This ensures notifications are sent at your designated time.
Sending Notifications to External Users without Salesforce Access
A critical feature of the G-Connector app is its ability to send record alerts to users without any Salesforce licenses. This feature enhances communication with external stakeholders like clients, partners, or vendors by sending email alerts to inform them about critical updates.
Comparing G-Connector Notifications and Salesforce Alerts
Selecting the right tool for sending alerts depends on your needs and workflow. Both G-Connector and Salesforce Alerts have distinct functionalities suited for different scenarios. This guide will help you understand when to use each tool based on time, scope, and customization.
Time of Alerts
- G-Connector: Use G-Connector if you need alerts based on periodic checks. G-Connector monitors conditions within Google Sheets at set intervals, making it ideal for situations where real-time alerts are not crucial but regular updates are required.
- Salesforce: Choose Salesforce Alerts when immediate notifications are necessary. Salesforce sends alerts as soon as a record changes, ensuring you receive real-time updates. This is particularly useful for time-sensitive activities where prompt action is required.
Scope of Monitoring
- G-Connector: Opt for G-Connector notifications if you need to monitor specific cells or ranges within Google Sheets. It is suitable for scenarios where the data is maintained and manipulated within Google Sheets, and you need alerts based on particular conditions in your spreadsheet.
- Salesforce: Use Salesforce Alerts to monitor record changes within the Salesforce database. This is ideal for tracking updates across your CRM data, such as changes in customer information, sales activities, or support cases.
Customization:
- G-Connector: Allows highly customizable conditions and notifications based on cell values and data within Google Sheets.
- Salesforce: Alerts are typically tied to predefined record events and changes within the Salesforce org.
Also Read: The Best Salesforce Automation Tools to unlock the power of your CRM data
Conclusion:
While Salesforce record alerts are crucial for keeping your team updated, they can be challenging to set up and maintain. They provide real-time notifications when records change, whereas G-Connector offers more flexibility with notifications based on conditions in Google Sheets.
G-Connector simplifies this process, promoting better collaboration and communication, even with those outside your Salesforce environment. It allows you to automate data operations and send notifications through various channels, ensuring timely updates and improved data management.
Start a 14-day free trial of G-Connector and see an immediate boost in your data management!

Xappex CRM data management solutions

G-Connector for Salesforce
Connect your Salesforce data to Google Sheets in a two-way sync.

XL-Connector for Salesforce
Connect and export your Salesforce data to Excel.

Looker Studio for Salesforce
Connect Salesforce reports and queries to your Google Data Studio dashboards.

Excel Merge
Calculate advanced Excel models. Generate Excel documents based on Salesforce data. All with a single click from a Salesforce record page.

XL-Connector 365
Connect and sync Microsoft Excel on all platforms with Salesforce.