Sharing Salesforce reports effectively is essential for team collaboration and decision-making.
This blog provides a detailed guide on sharing Salesforce reports and the challenges associated with this process. It also introduces tools like G-Connector and XL-Connector 365 by Xappex, which make sharing reports easier and more efficient for users both with access to Salesforce and also external users.
While sharing individual reports in Salesforce can be effective, sharing entire folders provides a more convenient way to manage permissions for multiple reports.
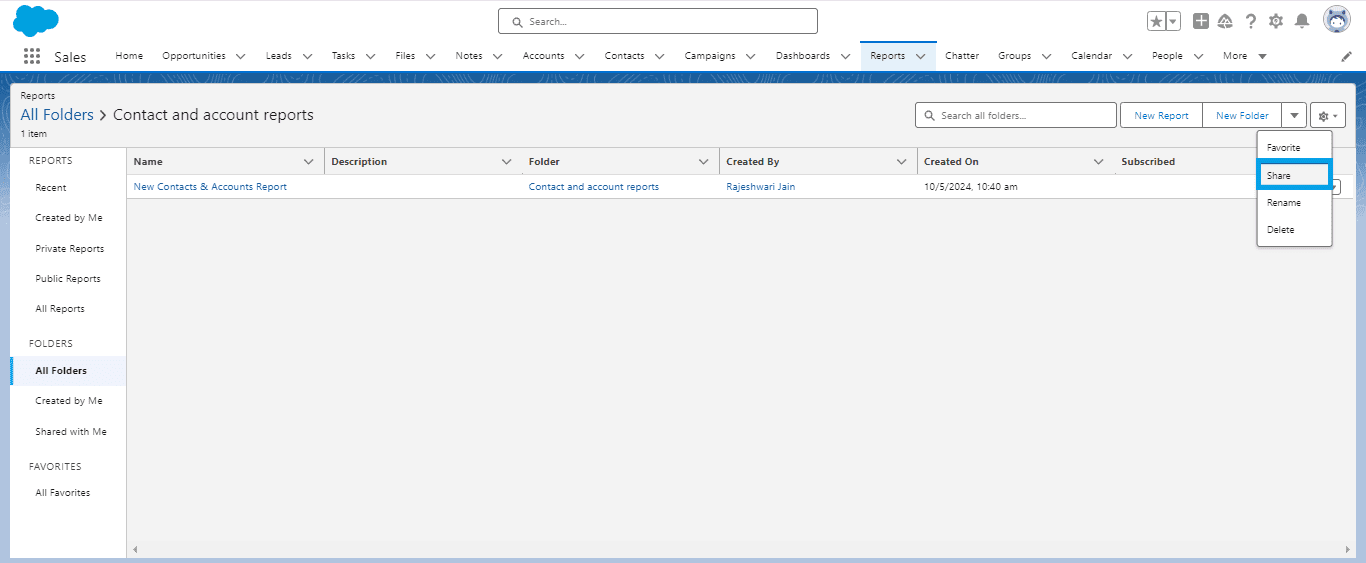
Head to the Reports tab in Salesforce and locate the report you want to share within its designated folder. Click the down arrow next to the “New Folder” and click “Share.”
In the “Share” window, select the names of the users, roles, or public groups to whom you want to grant access to the report. You can grant each recipient an access level (view, edit, or manage) based on requirement.
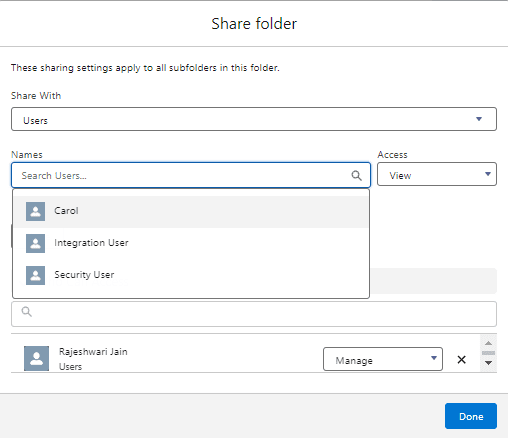
Once you’ve selected recipients and access levels, click “Share” to complete the process.
To Know more, please refer: Schedule and Subscribe to Reports
Challenges when sharing Salesforce reports
Sharing Salesforce reports is essential for collaboration and informed decision-making within an organization. However, several limitations and challenges can slow down the smooth distribution of these reports. Understanding these limitations is important for finding practical solutions and ensuring your team can fully use Salesforce data.
Accessibility Issues for Non-Licensed Users
A big challenge in sharing Salesforce reports is that only licensed users can access them. If a team member or board member doesn’t have a Salesforce license, sharing reports with them becomes difficult. You must export and share the reports through other means, adding extra steps and causing potential delays.
Row and Data Export Limits
Salesforce reports are restricted to displaying up to 2,000 rows in the formatted report, with the option to export up to 100,000 rows depending on the organization’s permissions and settings.
Limits for Sharing Reports in Salesforce
Salesforce imposes certain limitations when sharing reports or dashboard folders. Through the user interface (UI), you can share a folder with up to 25 users, groups, roles or territories.
If you need to share a folder with more than 25 entities, up to a maximum of 500 users, groups, roles, or territories, you must use the folder-sharing REST API. This involves technical know-how, so it may not be for everyone.
In an Unlimited Edition org, users can subscribe to 15 reports and 15 dashboards, while users in other orgs can subscribe to 7 reports and 7 dashboards.
Sharing your Salesforce reports is easy with Xappex! Your data isn’t stuck in Salesforce anymore. These tools let you break down barriers and share information with anyone with access to Google Drive or a Microsoft OneDrive.
The feature is excellent for teamwork, allowing everyone to view, modify, and update reports in Salesforce easily. Even those without expertise in Salesforce can view and work with the required data. Sharing and working together on reports is effortless, ensuring everyone who needs the information can access it easily.
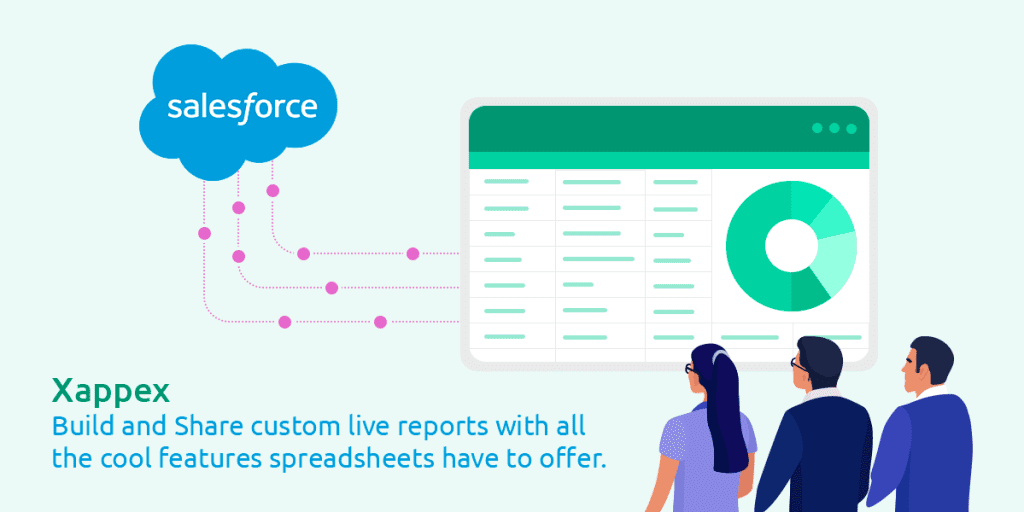
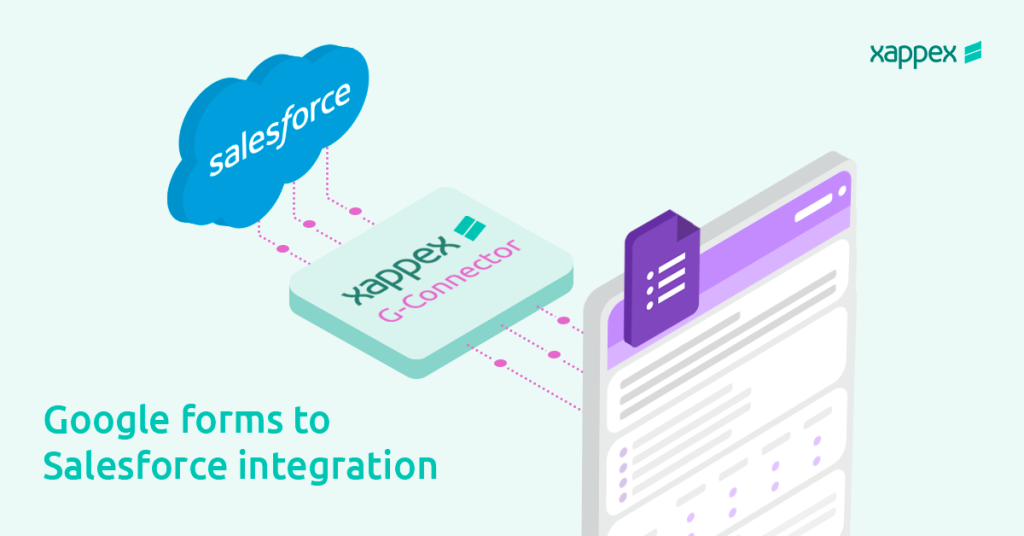
G-Connector integrates Salesforce with Google Sheets, providing a cloud-based data-sharing and collaboration solution. It lets you bring your Salesforce data into Google Sheets, view real-time reports, collaborate with your team, and send changes back to Salesforce.
It is ideal for teams that prefer using Google’s suite of tools for their collaborative work.
G-Connector’s snapshots keep historical Salesforce data organized, accessible, and ready for analysis in Google Sheets. It offers three main methods to create data snapshots:
- Timestamped Sheets: Create timestamped Sheets in Google Drive to store Salesforce report snapshots.
- Timestamped Tabs: Add timestamped tabs within the same Google Sheet for better organization.
- Appending Data: Append new data for continuous analysis.
This tool integrates with Excel to provide data manipulation, automation, and reporting features. XL-Connector 365 is compatible with Excel for Windows, Mac, and Excel Online, ensuring that your Salesforce data is accessible and manageable across all platforms.
It supports dynamic SOQL queries and offers synchronous and asynchronous data imports, enabling efficient data operations without row limits.
Export your Salesforce reports in Google Sheets
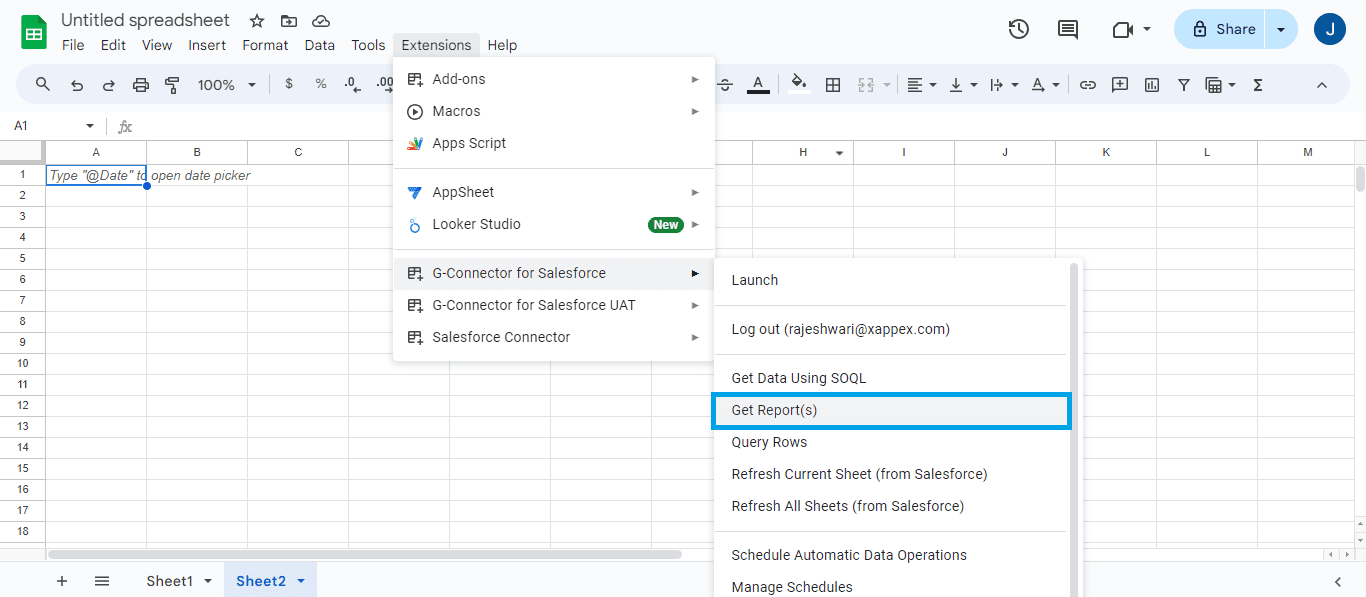
There are two ways to access your Salesforce reports with G-Connector:
- Menu Option: Look for the “Get Reports” option within the G-Connector add-on menu in your Google sheet.
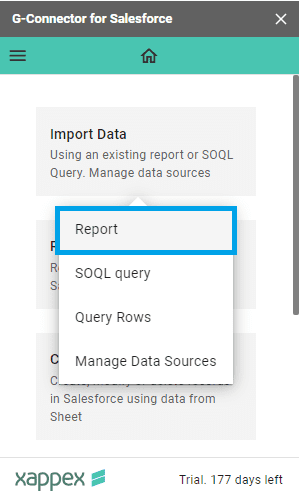
- Side Panel: Alternatively, if you’ve launched the G-Connector sidebar, navigate to the “Import Data” section and select “Report” to choose the specific report you want to work with.
Key features:
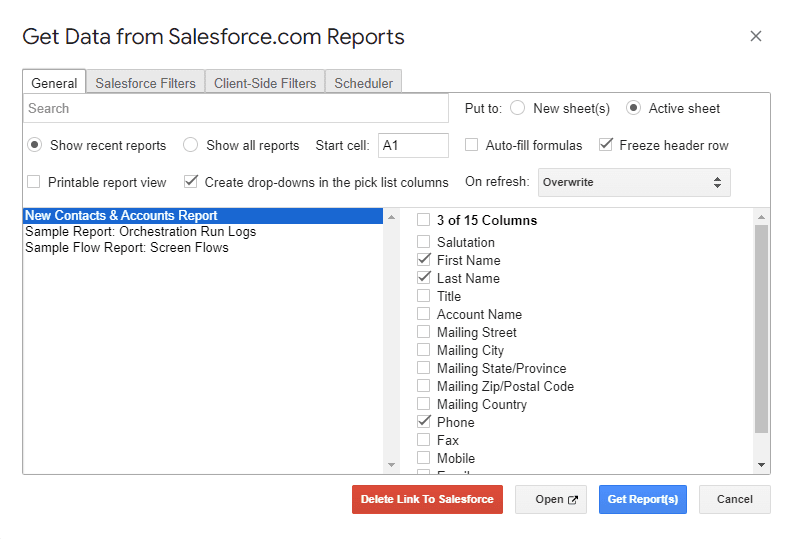
Salesforce Filters
If enabled, you can customize filters for the selected report. These customized filters will be saved with the report and applied on each refresh. Not all reports allow filter customization. If the tab is greyed out, you must edit the filters directly in Salesforce.
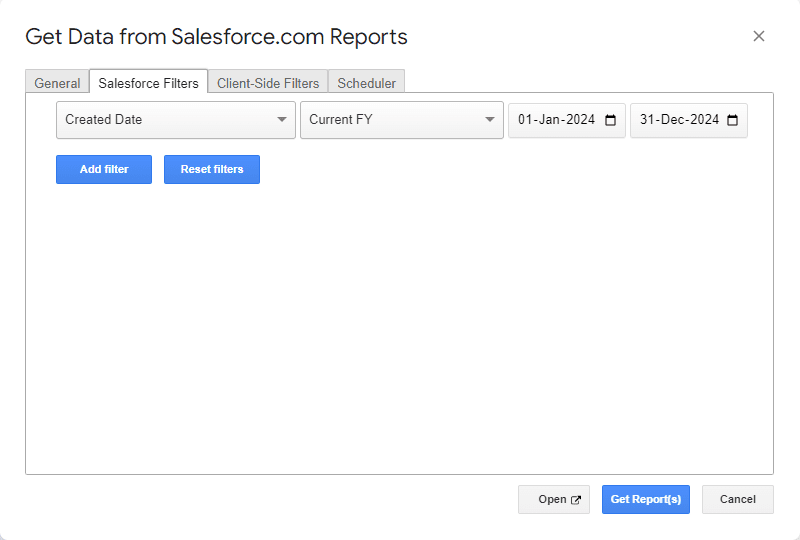
Apply additional custom filters to your Salesforce reports when pulling data into Google Sheets. This feature assists in refining large datasets, allowing for more focused and manageable analysis.
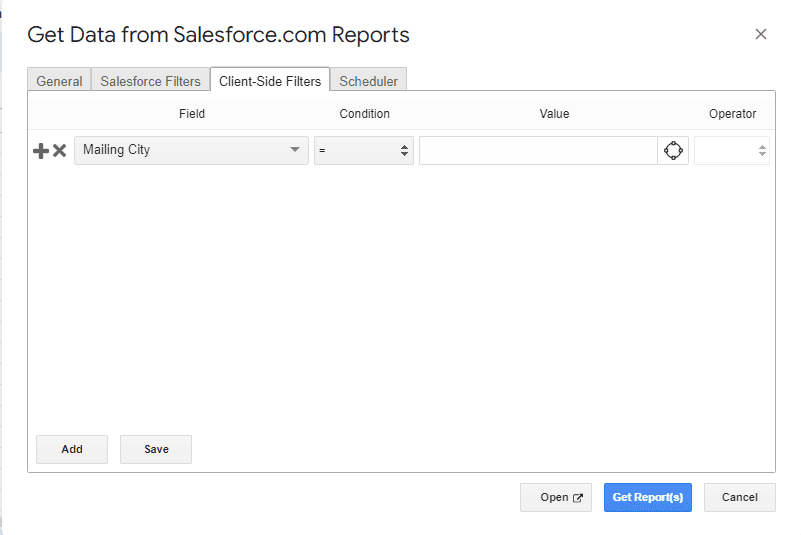
Options for Placing Report Data:
- New Sheet(s) or Active Sheet: Choose whether the report data will be placed in a new sheet or the currently active sheet. A new sheet is created when running a report for the first time by default.
- Start Cell: Determine the starting point for the report data, indicating the top-left corner of the exported data in Google Sheets.
- Printable Report View: If checked, the report will be exported in a formatted view. All reports are exported in detail view by default, similar to how you choose the export view in Salesforce.
- Create Drop-downs in Picklist Columns: If checked, a drop-down will be added to each column cell from a “picklist” field in Salesforce.
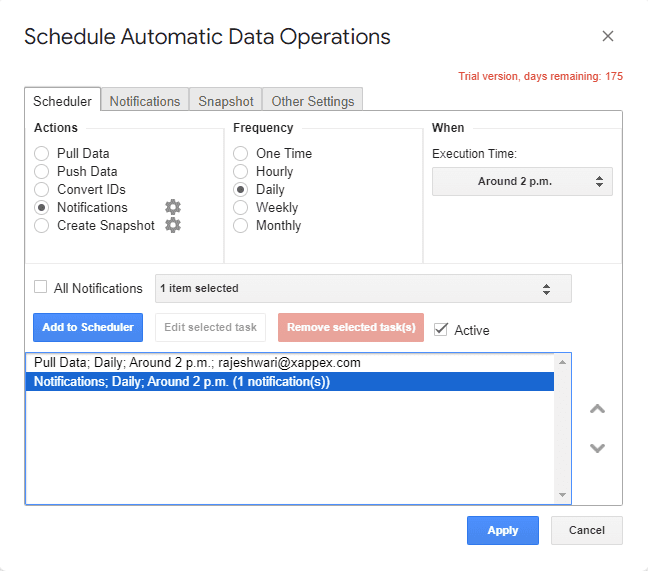
Schedule Automations:
G-Connector allows you to Schedule automatic data pulls from Salesforce into Google Sheets, making it easy to share Salesforce data with users. You can set up the automatic pulls to refresh hourly, daily, or weekly, giving you control over the data update frequency.
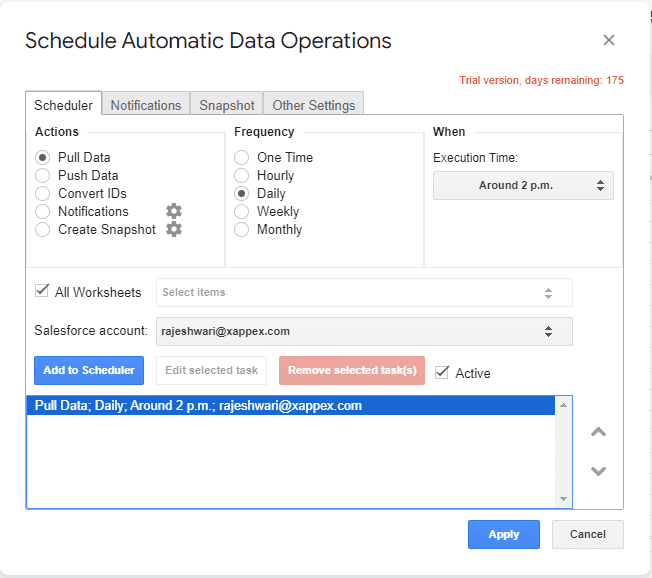
The automatic data pulls only work on the original worksheet where the Salesforce data was first imported. Sharing your spreadsheet via Google Drive allows others to view the data without needing G-Connector access.
Send Scheduled notifications to team members and management with G-Connector
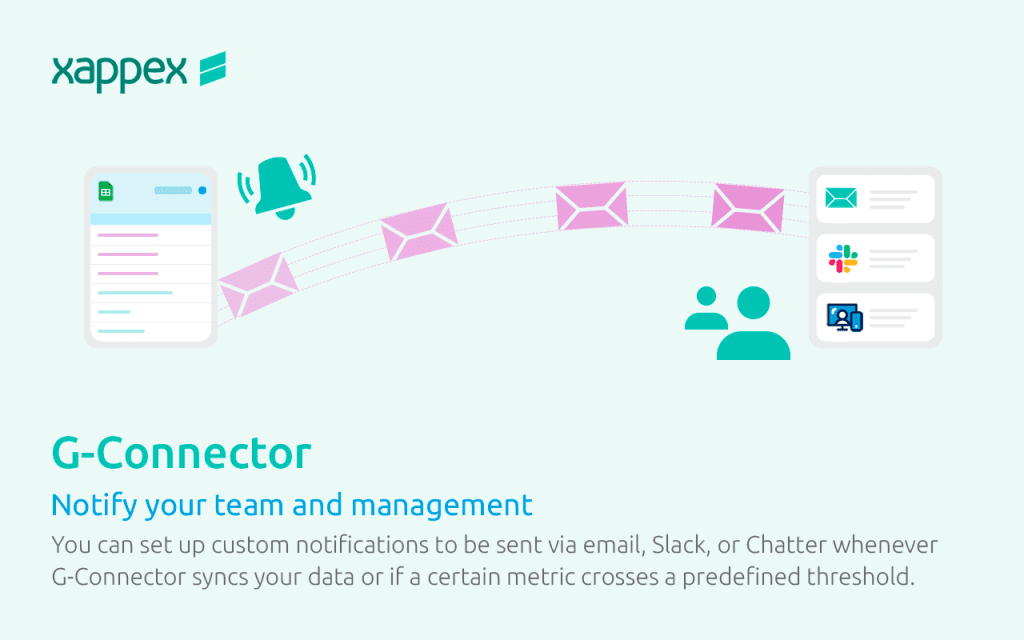
G-Connector offers an efficient method to keep your team updated following any automatic data updates in Salesforce. You can configure notifications to be sent out automatically through email, Slack, or Chatter groups.
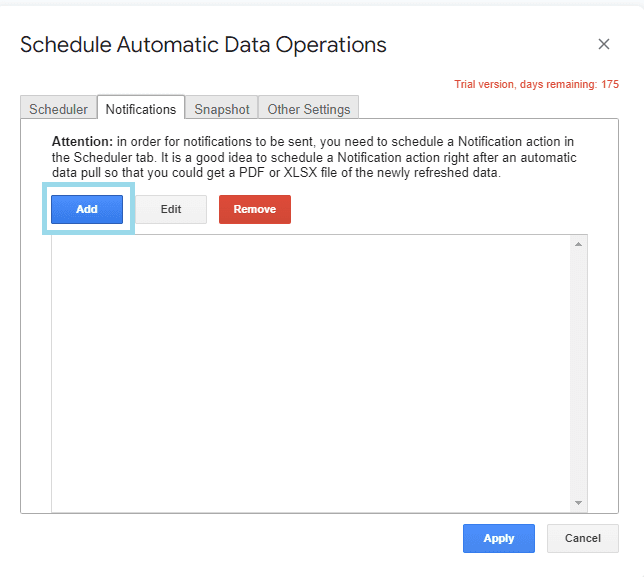
Steps to Configure Notifications:
Create a Notification: Go to the “Schedule Automatic Data Operations” menu and click the “Notifications” tab. Press the “Add” button to generate a new notification.
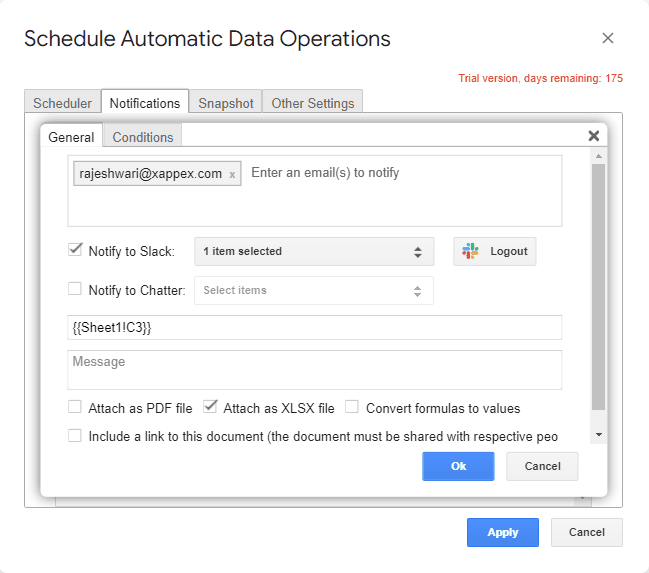
Include Dynamic Text (Optional): To reference specific cells containing the desired information, use double curly braces like so: {{CellAddress}}.
You can attach the report as a PDF or Excel file, or share a link to the document, depending on your needs. Simply select the desired option by checking the corresponding checkbox.
Set Notification Conditions (Optional): Under the “Conditions” tab, you can define specific circumstances that trigger the notification to be sent.
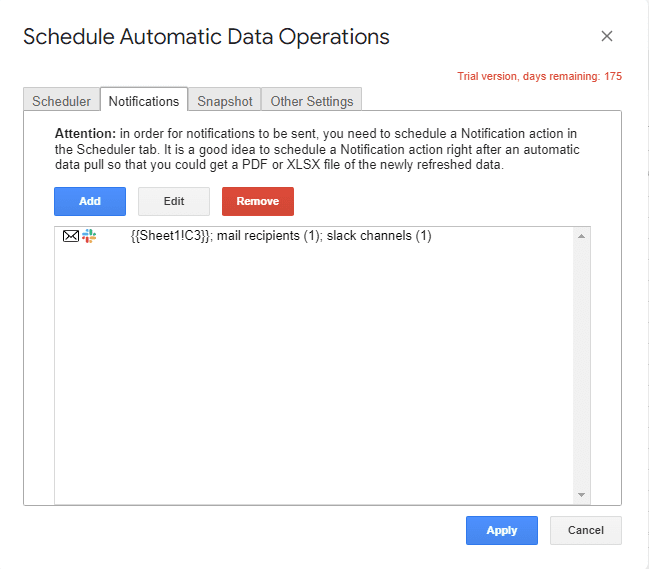
Schedule Notification: Finally, head to the “Scheduler” tab and add a “Notifications” action.
Conclusion
While Salesforce offers built-in report sharing, it has some limitations. Third-party tools like G-Connector and XL-Connector 365 address these issues by enabling data sharing with platforms like Google Drive and Microsoft OneDrive and scheduled team notifications. These tools help non-Salesforce users access the data and support collaborative analysis with real-time updates, scheduled refreshes, and customizable filters.
Start a 14-day free trial of XL-Connector 365 , G-Connector and see an immediate boost in your data management!
Rajeshwari Jain
Content Manager
Rajeshwari Jain is a Technical Support Specialist and Content Writer at Xappex. She applies her practical experience to assist customers and create articles on how Xappex tools work with Salesforce to improve data management and increase efficiency.
She began her IT career in 2022 as a Quality Assurance professional before transitioning into Salesforce administration and technical writing in 2023. With Salesforce Certified Administrator and Associate certifications, Rajeshwari writes blogs on Salesforce flows, admin tools, and updates to expand her skills outside of work.
In her free time, she enjoys reading tech blogs and experimenting with new tools.
Feel free to reach out to Rajeshwari for collaborations or to check out her Salesforce-focused content.