How to efficiently manage Scoping Rules in Salesforce
Is it hard for your sales team to find suitable leads, or do your support agents spend too much time looking for the appropriate cases? Scoping Rules in Salesforce can help!
This blog post will explain Scoping Rules, how they work, and some things to remember when using them. We’ll also show you a helpful Xappex XL-Connector tool that makes managing many Scoping Rules much easier!
What are the Scoping rules?
Scoping rules in Salesforce act like filters based on your specific criteria. These filters control which records a user sees by default in their custom objects, accounts, cases, contacts, leads, opportunities, and tasks.
They can be applied for list view (filter by scope), lookups, reports (filter by scope), search, SOQL, and SOSL.
Here are some ways Scoping rules can be helpful:
- Sales Teams: Filter leads by industry or region so sales representatives can concentrate on high-priority prospects.
- Customer Support: To ensure that the Cases assigned to specific agents or teams are based on product lines or customer segments for quicker resolution.
- Marketing Campaigns: Limit visibility to contacts or accounts that meet specific demographic or engagement criteria, enabling more targeted marketing efforts.
Understanding Scoping Rule Considerations in Salesforce:
While Scoping Rules in Salesforce are a great way to control what information users see, there are a few things to remember to ensure they work well.
- Available Editions and Rule Limits: In the Developer Edition, you can have up to two active rules per object, while in Performance and Unlimited Editions, you can have up to five active rules per object.
- Only one Scoping can be applied per user for a specific object.
- Scoping rules impact only the object they are created for, not its child objects.
- When referencing the Owner field, specify the object type (e.g., Owner:User).
- You can reference another object’s field using a single “dot” (one lookup level) in the record criteria.
- Scoping rule record criteria cannot reference fields on the parent object.
- Scoping rules support the following data types: Boolean, Date, Date and Time, Numbers (Double and Integer), References, Text, Time, and Single Picklist Values.
- Deleting custom fields or custom picklist values referenced in Scoping rules will result in errors.
- To disable a Scoping rule, first delete any list views or reports with “Filter by scope” selected.
- Deleting custom permissions used by Scoping rules will render those rules inoperable.
- Scoping rules can limit potential duplicate records shown, even with “Bypass sharing rules” enabled.
- Scoping rules only support the EQUALS operator (unless using SOQL).
- When using SOQL, the SELECT statement must include “USING SCOPE EVERYTHING” as it is the only valid scope clause syntax for Scoping rules.
- Scoping rules on the Account object don’t support the IsPersonAccount fields.
- The record criteria field supports the Comma-separated ID or string values.
- Scoping rules are designed for efficient performance. However, data volume and architecture can impact rule speed. Salesforce may disable inefficient rules or those causing performance issues. Test Scoping rules in a sandbox environment before deploying them in production.
To Know more, please refer: Scoping Rule Considerations
How do you create a scoping rule in Salesforce?
Creating a Scoping rule involves the following steps:
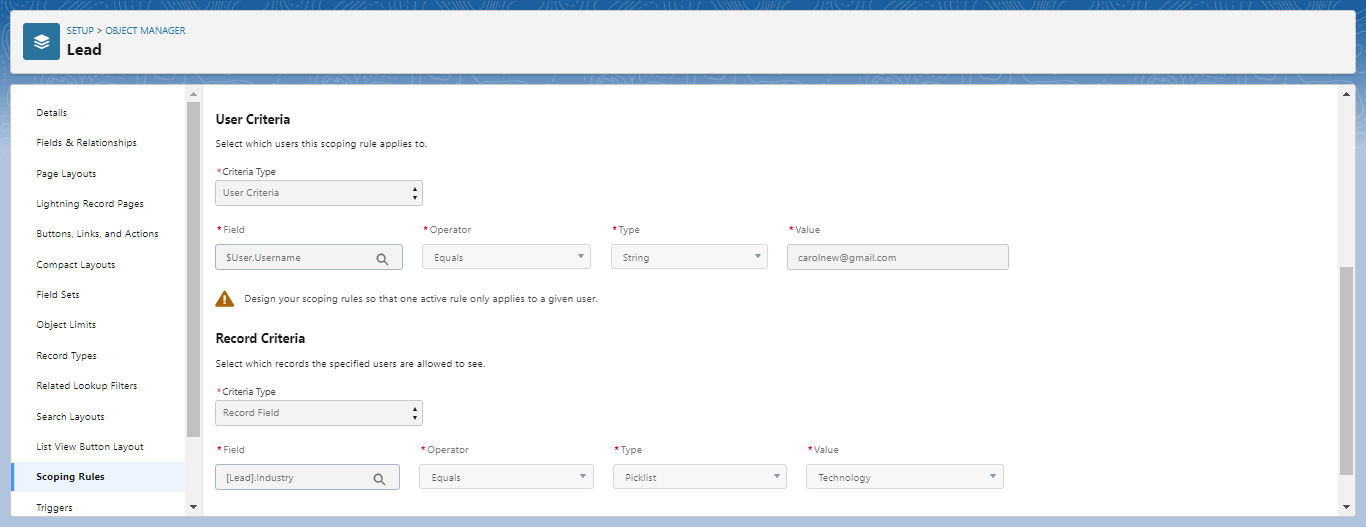
To create a Scoping rule in Salesforce, access Object Manager from the Setup menu and select the object (e.g., Leads). Then, click Scoping Rule, followed by “New Rule” in the sidebar.
Select “Is Active” to activate the rule upon saving.
Define User Criteria: Choose the users to whom this rule applies. For specific roles, profiles, or departments, use User Criteria. For custom permissions, select Permission Criteria and set the Boolean value appropriately.
Set Record Criteria: Specify which records the selected users will see by default. Use dot notation to reference another object’s field if needed. For multiple values, use a list of comma-separated strings or 15-character IDs.
Example: Create a Scoping rule that shows only leads from the ‘Technology’ industry to sales representatives.
Are you tired of editing Salesforce Scoping rules one by one? Try this!
Do you have a lot of Scoping rules in Salesforce that take a long time to manage?
The Manage Restriction and Scoping Rules feature within Xappex XL-Connector is here to help! Designed with user convenience in mind, this solution empowers you to manage these crucial access controls with greater efficiency. This feature is part of a Salesforce metadata management toolbox offered by XL-Connector to help admins increase their productivity in tasks that otherwise would demand a lot of time and manual effort.
XL-Connector by Xappex simplifies the management of Scoping rules through Excel, offering several advantages:
Bulk download Rules:
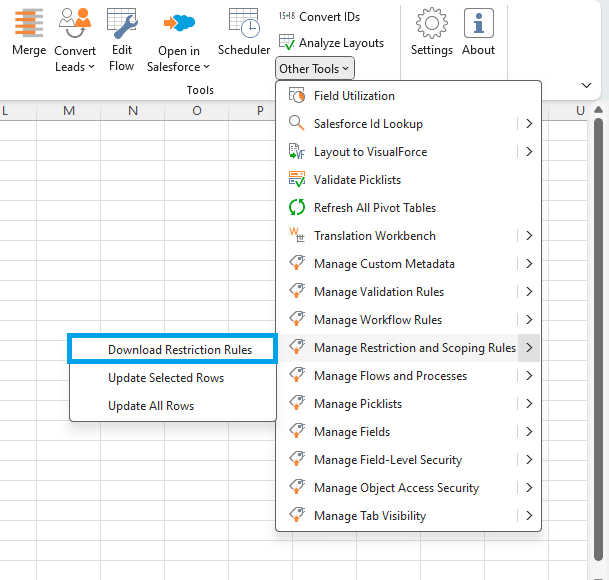
Download multiple Scoping rules simultaneously to save time and effort using the XL-Connector. Access the Scoping Rule by clicking.
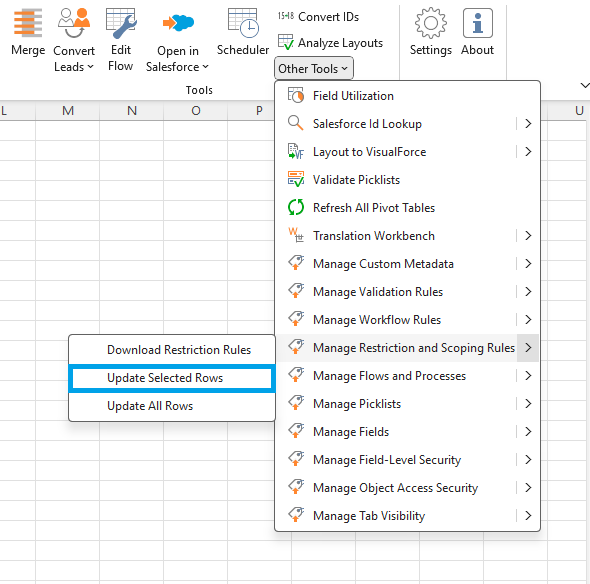
Other Tools -> Manage Restriction and Scoping Rules -> Download Restriction Rules.
Modify Existing Rules: Easily update criteria or deactivate rules directly from Excel.
Once Scoping Rules have been downloaded, you can edit the field values in the spreadsheet and update them in Salesforce by following these steps:
Other Tools -> Manage Restriction and Scoping Rules -> Update Selected Rows or Update all Rows.
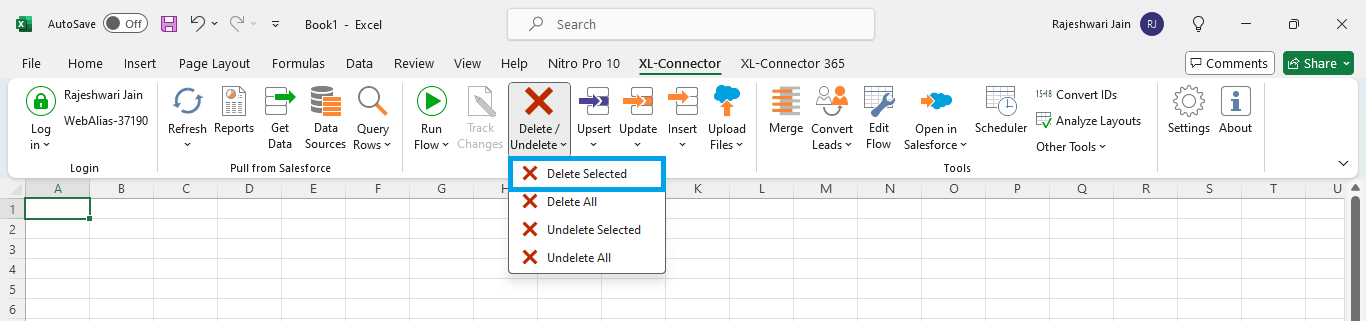
Delete Scoping Rules:
To Delete, select the required rows in the table, then click on the Delete button in the XL-Connector ribbon.
Create new Rules:
When creating new Scoping Rules, add rows at the end of the table, select the rows, and click on the “Update” or “Update Selected” button in the XL-Connector ribbon. Ensure that the “userCriteria” and “recordFilter” columns are not empty.
Access this blog post if you would like to learn more about how to manage Restriction Rules.
Conclusion
Even though Scoping Rules are helpful, managing many of them can take a long time. XL-Connector comes in to make things easier! This new tool lets administrators handle many Scoping Rules at once, making it faster to create new ones, change existing ones, or delete them entirely.
With XL-Connector, you can get the most out of Scoping Rules and make Salesforce work better for everyone.
Start a 14-day free trial of XL-Connector and see an immediate boost in your data management!

Xappex CRM data management solutions

G-Connector for Salesforce
Connect your Salesforce data to Google Sheets in a two-way sync.

XL-Connector for Salesforce
Connect and export your Salesforce data to Excel.

Looker Studio for Salesforce
Connect Salesforce reports and queries to your Google Data Studio dashboards.

Excel Merge
Calculate advanced Excel models. Generate Excel documents based on Salesforce data. All with a single click from a Salesforce record page.

XL-Connector 365
Connect and sync Microsoft Excel on all platforms with Salesforce.