Salesforce Data Loader is a widely used tool for mass exports, inserts, updates, and upserts. Many Salesforce admins use it daily for basic data management tasks, even though it comes with some limitations.
This article gives a clear overview of Data Loader, its advantages and drawbacks, and explains best practices for its use. It also compares Data Loader with other tools that offer live data exchange between Salesforce and spreadsheets.
What is the Salesforce Data Loader?
Salesforce Data Loader is a free client application for bulk data processing in Salesforce. It lets users import, export, update, and delete large volumes of records using CSV files or direct database connections. Introduced in the Winter ’09 release to replace Apex Data Loader, it efficiently transfers massive datasets while working within Salesforce API limits.
Key Features
Bulk Data Processing
Data loader processes large data sets in batches. It can handle up to 150 million records. This design improves performance and keeps you within Salesforce API limits. It works well for data migrations, mass updates, and system integrations.
CSV File Compatibility
It supports CSV files, which allows it to work smoothly with spreadsheets, databases, and other systems. This feature cuts down on the time needed for data preparation and migration.
Command-Line Interface (Windows)
It includes a command-line interface for Windows. This lets you automate tasks and schedule jobs using Windows Task Scheduler.
Supports All Salesforce Objects
The tool works with all Salesforce objects, including standard ones like Accounts and Contacts and custom objects. It allows you to easily update, delete, or export any data type.
Secure API Transactions
Data loader secures your data by encrypting it during transfers via Salesforce APIs. Although exported CSV files remain unencrypted on your device, you can add extra steps to secure sensitive information.
Error Logging
The system creates clear CSV error logs that show issues like validation errors or duplicate entries. You can fix the errors and reprocess the affected rows without restarting the whole job.
Download and Set Up Data Loader
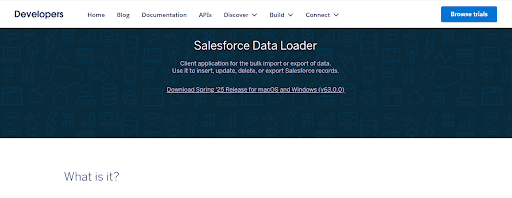
Where to Download Salesforce Data Loader?
Download the tool from the official Salesforce download page. It supports both Windows and macOS.
No login or special permissions are needed to download the Data Loader. However, to use it, you must have valid Salesforce credentials and the necessary permissions (detailed below).
System Requirements for Data Loader
Supported Operating Systems
It supports both Windows and macOS. On Windows, it runs on Windows 10 and Windows 11 (Intel x86–64 bit). On macOS, it supports both Intel and ARM systems running macOS 13.x (Ventura), 14.x (Sonoma), and 15.x (Sequoia).
Java Runtime Environment (JRE) Requirement
Salesforce Data Loader requires JRE 8 or later to function.
For Windows:
- Download and install the latest JRE from Java’s official site. Restart your system after installation.
For macOS:
- Install or update JRE using Java’s macOS installer. After installation, go to System Settings > Security & Privacy > General and grant permission to run the Data Loader.
User Access Permissions
To use Salesforce Data Loader, you need the following permissions in your Salesforce org:
- API Enabled — Your Salesforce administrator must enable this in your User Profile or a Permission Set.
- Object-Level Permissions — You need Read/Write access for objects you plan to import or export (e.g., Accounts and Contacts).
- Bulk API Access — Admins must assign “Bulk API” permissions through a Permission Set for large-scale operations.
Without these permissions, the Data Loader cannot perform data operations.
Data Loader Installation
The instructions below detail the installation process of the Data loader for Windows and macOS.
Installing on Windows
- Download Data Loader
If you haven’t downloaded Data Loader yet, download it from Salesforce’s official website. Verify the file’s authenticity by running the following command in a command prompt:
jarsigner -verify dataloader_v<version>.zip
Replace <version> with the actual version number to confirm the package’s integrity.
- Extract Files and Run the Installation Script
Open the downloaded zip file and extract all its contents to a designated folder.
Locate and double-click the install.bat file in the extracted folder. Follow any on-screen prompts to install Data Loader and choose your preferred installation directory.
- Configure Preferences
If a previous version exists, the installer will offer an option to overwrite it. Confirm your settings and complete all prompts to configure the installation.
After installation, launch Data Loader using the desktop icon, Start menu, or by executing dataloader.bat in the installation directory.
Installing on MacOS
Verify and Install Java Runtime Environment (JRE)
Ensure JRE version 17 or later is installed. If not, download it from Azul Zulu or Adoptium Eclipse Temurin, matching your macOS and CPU architecture.
Download Data Loader
Download the latest version from the Salesforce developer website. Verify the file’s authenticity as on Windows. Extract all files from the downloaded zip file and put them in a folder on your MacOS device.
Run the Installation Script
Double-click the installer.command file.
If a warning about an unidentified developer appears, go to System Preferences > Privacy & Security and click Open Anyway, or right-click the file and choose Open.
Complete Installation Prompts
Follow the prompts to select the destination folder and confirm the installation. If updating an older version, overwrite files.
Launch the Data Loader by double-clicking the dataloader.app icon or accessing it from the Applications folder. If upgrading, copy the config.properties file from the old installation’s /configs folder to the new one.
How to use Salesforce Data Loader?
Salesforce Data Loader is a bulk data import, Export, and management tool. It offers two modes: UI (User Interface) for most users and CLI (Command Line Interface) for Windows automation. This guide focuses on the UI version, providing step-by-step instructions for accurate data handling.
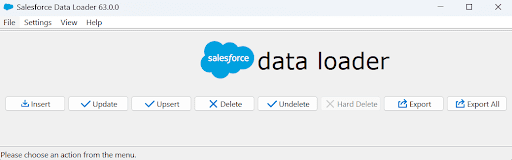
Launch Data Loader
Download and install Data Loader from Salesforce Setup if you haven’t already. Then, open the application to get started.
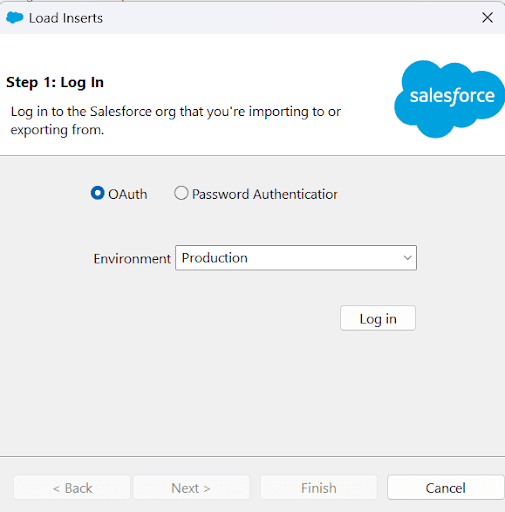
Log In to Salesforce
Enter your Salesforce credentials and log in. Select Use Custom Domain and enter the sandbox URL if you use a sandbox. When prompted, grant the necessary permissions.
Select Operation
Data Loader offers several operations you can perform, such as Insert, Update, Upsert, Delete, Hard Delete, and Export. Choose the operation that matches your data task.
- Insert: Add new records to Salesforce.
- Update: Modify existing records in Salesforce.
- Upsert: Insert new records or update existing ones based on a unique external ID.
- Delete: Remove records from Salesforce.
- Hard Delete: Permanently delete records from Salesforce (use with caution).
- Export: Retrieve data from Salesforce.
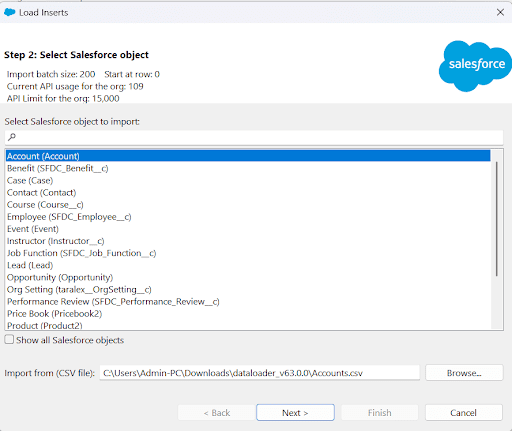
Select the Object
Pick the Salesforce you’re working with, such as Account, Contact, or Opportunity. The dropdown list will display all standard and custom objects. Click Browse to upload the relevant CSV file.

Configure CSV File for imports
Prepare your file correctly to avoid errors:
- Match column headers with Salesforce field names.
- Use the correct date format (YYYY-MM-DD or MM/DD/YYYY based on locale).
- Save the file in UTF-8 encoding to prevent character issues.
- Ensure data consistency and remove duplicates.
Map Fields to Columns
Click Create or Edit a Map to map fields or use auto-map to match column names manually. Ensure all required fields are mapped correctly. Save the mapping for future use if needed.

Start the Operation
Click Next, review the summary, and confirm your selections. If working with large datasets, enable batch processing for efficiency.
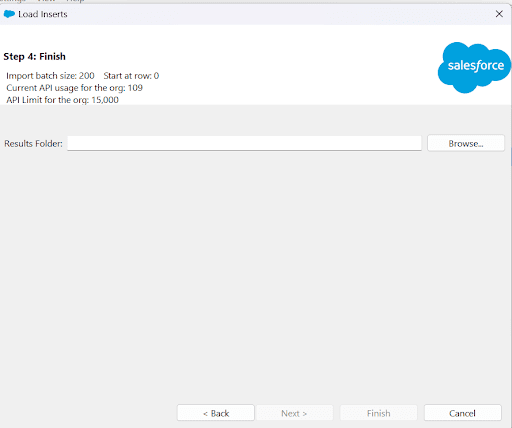
Monitor Progress and Review Results
Check the Data Loader Log to track progress. Once the operation is complete, you’ll receive a detailed success and error log in CSV format.
Save Your Settings (Optional)
You can save your settings as a configuration file for future use, streamlining the process if you need to perform similar data tasks.
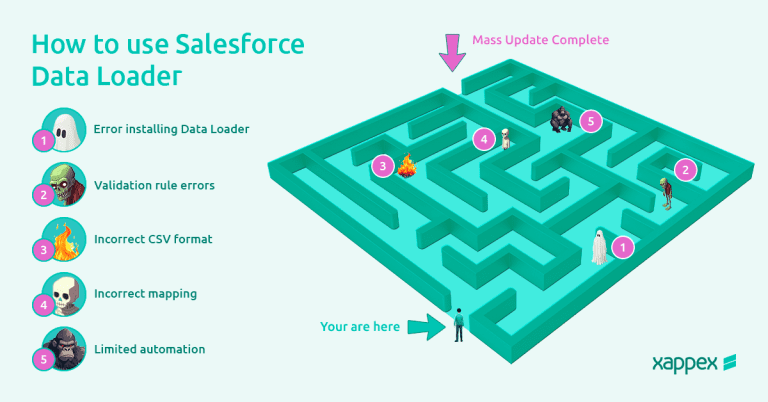
Data Loader Limits
Salesforce Data Loader is useful for bulk data operations but has limitations. Understanding these helps in managing data efficiently.
File Size Limits
Data Loader supports CSV files up to 150 MB. Larger files may cause errors or fail to process. To avoid issues, split large files into smaller ones or compress them.
Record Limits
It can handle up to 150 million records, but large datasets may slow performance. Processing speed depends on system resources and network capacity. Using smaller batches and optimizing data structure improves efficiency.
API Usage Limits
Each operation uses API calls, which have daily limits based on your Salesforce edition. Exceeding the limit stops further API-based tasks until the next reset. To manage usage, monitor API calls, adjust batch sizes, and schedule tasks during low-traffic hours.
No Real-Time Processing
Data Loader works in batches and does not support real-time updates. For instant updates, use Salesforce Flow, Apex Triggers, or third-party tools that offer continuous data synchronization.
Data Format Limits
Data Loader supports only CSV files and requires strict formatting. Dates must follow YYYY-MM-DD, and numbers must match expected formats. JSON and XML are not supported. Checking data before upload and using conversion tools can prevent errors.
No Built-In Scheduling
Data Loader does not have a built-in scheduling feature. Use the command-line interface for automation and schedule tasks with Windows Task Scheduler or cron jobs.
Error Handling Limits
Errors like incorrect field mappings or formatting cause records to be skipped. Data Loader logs these errors, but users must fix them manually. To reduce failures, check error logs, validate data before import, and process records in smaller batches.
Automation Tasks for Salesforce Data Loader
Automating your Salesforce Data Loader tasks is important for managing and keeping data consistent.
Best Practices for Automation
Follow these guidelines to set up automated data tasks:
- Prepare Your Data: Clean and validate your data before loading it to minimize errors.
- Protect Credentials: Use the Data Loader encryption utility to convert your Salesforce password into an encrypted string and include this in your configuration file.
- Monitor Your Jobs: Implement logging and alerts so you can quickly address any issues that arise.
- Use Bulk API for High Volumes: Switch to Bulk API for large datasets to reduce API calls and speed up processing.
Command-Line Integration
The CLI enables automation without using the UI (Windows only). Here’s how to set it up:
Step 1: Installation
Download the Data Loader from Salesforce Setup under Data Management. Ensure Java Runtime Environment (JRE) is installed.
Steps 2: Generate an Encryption Key
Open a command prompt, go to the Data Loader bin folder, and run:
encrypt.bat -k (Path to key file)
example: C:\Users\rjain\Dataloader_v63.0.0\bin>encrypt.bat -k
Save the key in the .txt file.
Step 3: Encrypt Your Password
In the same prompt, run:
encrypt.bat -e <YourOrgPassword><Salesforce Security Token> <PathToYourKeyFile>
Use the encrypted password in next steps.
Step 4: Create a Mapping File
Prepare a .sdl file mapping CSV headers to Salesforce field names.
Step 5: Configure the Process File
Edit the process-conf.xml file with:
Operation type (insert, update, etc.), Username, encrypted password, instance URL, Paths to the CSV, mapping file, and logs.
Step 6: Run the Batch Job
process.bat "D:\DataLoaderInsertFiles" leadInsert
Replace with your specific folder and process.
Step 7: Test Your Scripts
Test your scripts in a sandbox before deploying them in production. This lets you catch errors and adjust your processes without affecting live data.
Always back up your data before running automated tasks that modify or delete records. A backup lets you restore your data if something goes wrong.
Keep clear records of your configuration files, mapping files, and automation steps. Good documentation makes troubleshooting and future updates easier.
Scheduling tasks
You can run Data Loader jobs on a set schedule for your Salesforce data using Windows Task Scheduler. To do this, follow these steps:
- Open the Windows Task Scheduler and create a new task from the Action tab.
- In the task settings, choose to run a program and set the program/script to the Data Loader executable (for example, “C:\Program Files (x86)\salesforce.com\Data Loader\bin\process.bat”).
- Add the operation and path to your configuration file in the “Add arguments(optional)” field.
- Pick a schedule (daily, weekly, etc.) and a time for the task.
Optimizing batch sizes
Selecting the right batch size in Salesforce Data Loader is vital for managing API usage and reducing data errors. An optimal batch size helps prevent timeouts and maintain consistent performance with large datasets.
- Begin by monitoring Salesforce governor limits. Use monitoring tools or custom dashboards to check API consumption and adjust batch sizes as needed.
- Start with a sample batch records and note the processing time when testing. Gradually increase the batch size until you notice a drop in performance. Run tests with various batch sizes to see if smaller groups help avoid issues or if larger groups speed up processing.
- For extensive data, distribute the workload among several Data Loader instances. This method divides the task and can cut down overall processing time.
- Review your settings periodically. As data volume, network conditions, or system updates change, you might need to revise your batch size configuration.
- Document your batch size choices and the results of your tests. Sharing these records with your team can lead to continuous improvements in data handling practices.
Alternatives to Salesforce Data Loader
Salesforce Data Loader reliably handles bulk imports, exports, updates, and deletions in Salesforce. However, it relies on CSV files and manual processing, limiting flexibility and automation.
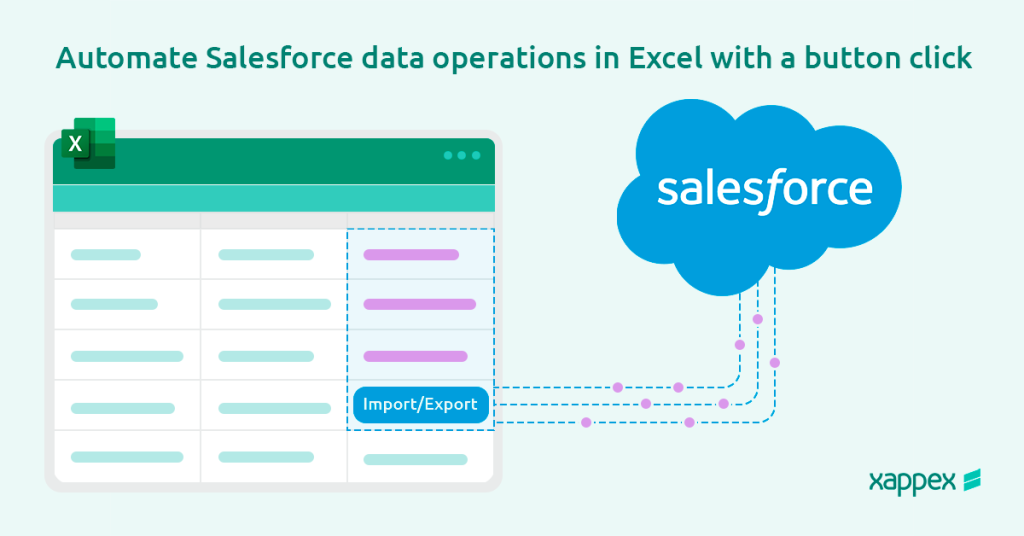
Alternative solutions offer direct integration with Excel or Google Sheets, automated workflows, and advanced data transformation features. For instance, Xappex XL-Connector lets users work directly within their spreadsheets (no csv hassle!) to clean, update, and sync data with Salesforce while providing metadata management and dynamic refresh capabilities.
For a detailed comparison of these tools, see our guide: The Best Salesforce Data Loader.
Conclusion
Data Loader is a popular choice for basic, one-time data operations. However, its reliance on CSV files means that manual file handling, data editing, and error checking can take up much time for admins who work with data daily.
For ongoing tasks, alternatives like Xappex offer automation, near-live sync of Salesforce data to a spreadsheet, and improved data and metadata manipulation, making them a better option for regular use.

Florencia Mouriz
Florencia Mouriz is a professional with over two years of experience at Xappex, where she has performed as a Technical Support Agent and Coordinator, and Technical Writer. In this role, Florencia provides support to customers while creating educational content and tutorials that guide users through the implementation of Xappex tools with Salesforce. Her contributions seek to enhance customer understanding and optimize the use of these tools.
Before joining Xappex, Florencia gained valuable experience participating in diverse projects for other companies, where she worked as a Salesforce Administrator and implemented Vlocity solutions. She has an extensive background in Salesforce ecosystems and is determined to deliver impactful results for our company.
Based in Tandil, Bs As, Argentina
To learn more about Florencia’s experience and connect with her, visit her LinkedIn profile